Pages

Thursday, September 30, 2021

Moroccan Chocolate Cake: Retro Ad with Recipe

Not sure what makes this Morocco Chocolate Cake Moroccan.. maybe the Raisin Nut Frosting? This November 11, 1940 Baker's Retro Ad with Recipe is really delicious and unique. This Morocco Chocolate Cake is very moist. You can always substitute your favorite dark chocolate (and cut down on the sugar a bit), too, for 2021 sensibilities and taste. And, if you're wondering the Bob Hope/Bing Crosby movie Road to Morroco wasn't released until 1942.


Wednesday, September 29, 2021

COFFEE CHOCOLATE CHIP COOKIES: National Coffee Day

Today is National Coffee Day. So many ways to celebrate, especially if you add Chocolate. You can always have a Cafe Mocha, Chocolate Coffee Fudge, Chocolate Clouds in your Coffee, Irish Coffee Chocolate Cake, Irish Coffee Truffles, or pick up some Chocolate Covered Coffee Beans.

In honor of the day, I thought I'd re-post one of my favorite recipes for Coffee Chocolate Chip Cookies. What I love about Chocolate Chip Cookies are the infinite varieties.

As I've mentioned before, your final product is only as good as your ingredients. Use the very best Chocolate, Espresso (or Coffee) Beans, Vanilla, Flour, Butter and other ingredients! This recipe calls for a baking stone. You can use a pizza stone. If you don't have one, you can make these Coffee Chocolate Chip Cookies the traditional way. The stone helps makes them gooey on the inside and crispy on the outside. I've adapted this recipe from ehow.com.

COFFEE CHOCOLATE CHIP COOKIES 

Ingredients
1 cup unsalted butter, softened
2 fresh large eggs (room temperature)
2 cups brown sugar
6 Tbsp granulated sugar
5 tsp pure vanilla extract
1 tsp baking soda
1 tsp baking powder
1 tsp sea salt
3 - 1/2 cups flour
4 tsp ground espresso beans (or finely ground coffee beans). Try this recipe with ground chocolate covered Coffee beans. Gives it just a bit more chocolate!
16 oz dark chocolate (65-75% cacao) chopped into small pieces (or dark chocolate chips)
Baking Stone

Directions
Toss butter in microwave for 20 seconds to SOFTEN not melt the butter. (or leave out in advance, so it's already softened)
Cream butter and sugars together until fluffy. Mixture should be well blended but firm.
Add 2 eggs. Beat. Add vanilla. Mix well. Set aside.
Sift flour, baking soda, baking powder, and salt into another bowl. Add ground coffee or ground espresso beans.
Add dry ingredients to wet mixture, beating in a little at a time. Fold in chocolate pieces (or chips).
Put cookie dough in refrigerator for 2 hours to firm up. Put wax paper on top to prevent drying.
Preheat oven to 350. Put hot stone in Oven.
Take hot stone out of oven. Drop cookie balls (use a small scoop or form balls) onto stone, smashing with fork after dropping. Put back in oven on stone.
Bake for about 8 minutes. Depends on your oven, of course.
Transfer with spatula to wire rack.
Hint: Check the first one. If the cookies fall apart or aren't cooked all the way, give them another minute.

Tuesday, September 28, 2021

STRAWBERRY CREAM PIE WITH OREO COOKIE CRUST: National Strawberry Cream Pie Day

Today is Strawberry Cream Pie Day. Strawberries are still fresh in the market, and this Strawberry Cream Pie with Oreo Cookie Crust is easy and delicious. There are lots of recipes out there, but I really recommend this one. I've adapted the recipe from allrecipes.com, and of course, I added a Chocolate Crust--and for this pie an Oreo Crust.

Strawberry Cream Pie with Oreo Cookie Crust

Crust
25 Oreo cookies
5 Tbsp unsalted butter, melted

Directions
Crush cookies or whirl in food processor. Stir cookie crumbs and melted butter together.
Press crumbs into bottom and upsides of 9" pie plate. Bake for 8 minutes at 350. Cool before filling.

Filling
1 quart strawberries, sliced
1 (13.5 ounce) container strawberry glaze  (or you can make your own by boiling down strawberry jam with a little water and straining)
1 (4 ounce) package cream cheese, softened
1/2 cup confectioners' sugar
1/4 tsp ground cinnamon
1 tsp pure vanilla extract
1 cup heavy whipping cream

Directions
Stir strawberries with glaze in bowl and place in refrigerator to chill.
Stir cream cheese, confectioners' sugar, cinnamon, and vanilla extract together in bowl.
Beat cream in separate bowl with electric mixer until it just begins to thicken. Add cream cheese mixture and continue beating until thick.
Pour cream mixture into baked pie crust. Top with strawberry mixture.
Chill for 1 hour before serving.

Monday, September 27, 2021

CHOCOLATE MILK: National Chocolate Milk Day

Today is National Chocolate Milk Day, so I thought I'd post this  article from NPR on excerise and fitness. If you're reading this post, you're probably sitting too long at your computer. The headline of this article is Stand Up, Walk Around, Even Just for Twenty Minutes.

O.K. I know you'll want to read the entire article, but here's the final paragraph. So pertinent to this blog.

The Ultimate Post-Workout Beverage: Use chocolate milk to replenish sugars after an intense workout. Reynolds calls it an "ideal recovery beverage" because it has the right ratio of carbs and proteins to aid your body's recovery process.

Fitness Magazine also has an article on Chocolate Milk as a Post-Workout Drink. The article explains that chocolate milk after a tough workout can help replenish exhausted muscles and significantly aid exercise recovery. Note, though, that the article goes on to say that it works best for high intensity workouts (and probably not the 20 minute stroll as noted above).

Drinking plain water after exercise replaces sweat losses — and that's it. "Chocolate milk provides carbohydrate replenishment to your muscles — something they can metabolize," said Jason Karp, MS, another researcher for this study. "There's nothing to metabolize in water." 
Stager's assessment of chocolate milk is even simpler. "It's water plus a whole lot more," he said.

So get out there, walk around, stretch (or not!) and drink chocolate milk when you're finished exercising...that's real chocolate milk and not chocolate 'drink'...

Chocolate Milk

Ingredients
11 ounces cold milk
1-1/2 teaspoons Dutch-process cocoa
1/2 tsp sugar or 3/4 tsp honey

Directions
Heat 1/4 cup milk in microwave until steaming (15 seconds)
Add cocoa powder and sugar (or honey) to hot milk. Stir until lumps are gone,
Put mixture into glass and fill with remaining cold milk and stir.

Sunday, September 26, 2021

KEY LIME PIE WITH CHOCOLATE GRAHAM CRACKER CRUST: National Key Lime Pie Day!

Key Lime Pie is one of my favorite pies. There seem to be several different Key Lime Pie Days (September 23, 26, and June 15). You pick... or have this easy delicious pie whenever you want. I'm going with September 26 for the purposes of this blog!

Several years ago when I visited the Florida Keys, my sister and I tasted over 25 different key lime pies. We judged them on tartness, firmness, sweetness (too sweet is unacceptable), whipped cream vs. meringue, and more. It was a hard job, but we had to do it. 

FYI: Key Lime Pie is the official pie of the Florida Keys.

I've made different variations of key lime pies, and, as I always say, you can never have too many recipes. Variety is what it's all about. One ingredient that is essential is using real key limes.

I buy key limes at my market. Key Limes are definitely different from 'regular' limes. Key limes are smaller, about the size of a ping-pong ball. They are round, think-skinned, and contain very few seeds. They're juicier than other limes, too. Green key limes are actually immature fruits. They ripen to yellow as they mature. That being said, I buy them green, probably because that's they way they sell them at my market. Just an FYI: bottled Key Lime juice is sometimes used in Key Lime Pies. This juice is not always made from key limes. Find fresh key limes, if you can. It will make a huge difference.

Key limes are also known as Mexican limes and West Indies limes. Cultivated for thousands of years in the Indo-Malayan region, this variety made its way to North Africa and the Near East via Arabian traders, and then carried on to Palestine and Mediterranean Europe by the Crusaders. Columbus is credited with bringing the Key lime to Hispaniola (Haiti), where it was carried on by Spanish settlers to Florida. Key Limes are found in in South Florida, particularly the Florida Keys, hence the current common name of Key Lime. Due to hurricane-depleted soils, locals switched from pineapple commercial crops to limes in 1906, and business boomed until a hurricane once again reared and wiped out the lime groves, never to be restored. Sadly, even if they had been, they would be gone again after several other hurricanes. Most Key limes now come from Mexico.

Key Lime Pies are yellow, not green (unless you add food coloring--ugh!).  And, some people top Key Lime Pie with Meringue.. some with whipped cream!

Key Lime Pie with Chocolate Graham Cracker Crust

Ingredients

Crust
1 1/2 cups crushed chocolate graham crackers
3 Tbsp sugar
1/3 cup butter, melted
Spray pan with non stick spray.

Filling
1 can (14 ounces) sweetened condensed milk
3 egg yolks
2/3 cup fresh squeezed Key Lime juice
1 Tbsp grated Key Lime zest

Directions

Crust
Mix together crumbs and sugar in bowl, add butter, and mix well. Press into bottom and up sides of  9-inch pie pan. Make it tight.
Bake 350 F for 8 minutes.
Allow to cool on a wire rack.

Filling
Beat egg yolks and grated Key Lime zest for about 5 minutes until fluffy.
Add sweetened condensed milk and beat for 4 more minutes.
Reduce speed and beat in lime juice until combined.
Pour into prepared chocolate graham cracker crust.
Bake at 350 for 15 minutes (until firm in center)
Remove from oven and cool on wire rack.
Cover and chill for 2 hours.
Top with Whipped Cream or Meringue (whichever you prefer)

Saturday, September 25, 2021

ICE CREAM CONE DAY: History and Recipe

Oh no! I totally forgot to post on National Ice Cream Cone Day, September 22. I love a good ice cream cone, and as this Retro Ad shows, so does EVERYBODY.  So in honor of the day, here's a bit of history about ice cream cones from the International Dairy Foods Association. As I've mentioned many times on this blog, you can find all kinds of food history and recipes at Food Association sites.

HISTORY OF THE ICE CREAM CONE

The first ice cream cone was produced in 1896 by Italo Marchiony. Marchiony, who emigrated from Italy in the late 1800s, invented his ice cream cone in New York City. He was granted a patent in December 1903.

Although Marchiony is credited with the invention of the cone, a similar creation was independently introduced at the 1904 St. Louis World's Fair by Ernest A. Hamwi, a Syrian concessionaire. Hamwi was selling a crisp, waffle-like pastry -- zalabis -- in a booth right next to an ice cream vendor. Because of ice cream's popularity, the vendor ran out of dishes. Hamwi saw an easy solution to the ice cream vendor's problem: he quickly rolled one of his wafer-like waffles in the shape of a cone, or cornucopia, and gave it to the ice cream vendor. The cone cooled in a few seconds, the vendor put some ice cream in it, the customers were happy and the cone was on its way to becoming the great American institution that it is today.

St. Louis, a foundry town, quickly capitalized on the cone's success. Enterprising people invented special baking equipment for making the World's Fair cornucopia cones.

Stephen Sullivan of Sullivan, Missouri, was one of the first known independent operators in the ice cream cone business. In 1906, Sullivan served ice cream cones (or cornucopias, as they were still called) at the Modern Woodmen of America Frisco Log Rolling in Sullivan, Missouri.

At the same time, Hamwi was busy with the Cornucopia Waffle Company. In 1910, he founded the Missouri Cone Company, later known as the Western Cone Company.

As the modern ice cream cone developed, two distinct types of cones emerged. The rolled cone was a waffle, baked in a round shape and rolled (first by hand, later mechanically) as soon as it came off the griddle. In a few seconds, it hardened in the form of a crisp cone. The second type of cone was molded either by pouring batter into a shell, inserting a core on which the cone was baked, and then removing the core; or pouring the batter into a mold, baking it and then splitting the mold so the cone could be removed with little difficulty.

In the 1920s, the cone business expanded. Cone production in 1924 reached a record 245 million. Slight changes in automatic machinery have led to the ice cream cone we know today. Now, millions of rolled cones are turned out on machines that are capable of producing about 150,000 cones every 24 hours.

ICE CREAM CONE RECIPE 

Ingredients
2 eggs
1/2 cup white sugar
1/4 cup butter, melted and cooled
3 tablespoons milk
1/2 teaspoon vanilla extract
1/3 cup all-purpose flour
1/8 teaspoon salt
3 tablespoons vegetable oil, or as needed

Directions
Whisk together eggs and sugar in a large bowl until frothy. Whisk in butter, milk, and vanilla. Gradually whisk in flour and salt until smooth. Batter should be thin; you can stir in more milk if needed.
Heat small skillet or griddle over medium heat. Brush pan lightly with oil. Pour about 1/4 cup of batter onto skillet and turn to spread out batter into thin circle. When underside is golden brown, flip over and cook until golden on other side. Remove from pan and form into cone while it's hot, squeezing end to seal. Place on wire rack to cool and harden completely.
Repeat with remaining batter.

Want to add chocolate? Dip the cone in melted dark chocolate and let it set before filling. 

Tip: Want to make sure your ice cream doesn't drip through the bottom of your cone? Put some melted dark chocolate in the bottom, let harden, and then fill!


Friday, September 24, 2021

CHOCOLATE CHERRIES JUBILEE: National Cherries Jubilee Day!

Today is National Cherries Jubilee Day! Cherries Jubilee was created by Chef August Escoffier in honor of Queen Victoria's Jubilee celebration. Cherries were her favorite fruit. The original recipe featured cherries poached in syrup and warmed with brandy that was set afire just prior to serving.

But this is a chocolate blog, so here are two recipes - one for Chocolate Cherries Jubilee Cake and one for Chocolate Cherries Jubilee. The cake is moist and scrumptious. You can also pour the Cherries Jubilee sauce over your own favorite chocolate cake!

CHOCOLATE CHERRIES JUBILEE CAKE!

Cake:
3/4 tsp baking soda
1 cup buttermilk
1- 1/2 cups cake flour or 1-1/4 cups all-purpose flour
1- 1/2 cups granulated sugar, divided use
1/2 cup unsweetened DARK cocoa powder
1/2 tsp salt
1/2 cup Canola oil
2 large eggs, separated
1/2 tsp pure vanilla extract

Cherry Sauce:
1 (16 or 17-ounces) can pitted dark sweet cherries, drained (reserve 3/4 cup liquid)
1 Tbsp granulated sugar
1 Tbsp Kirsch or Cherry Brandy
1 Tbsp cornstarch
Dash salt

Vanilla ice cream

Directions
Heat oven to 350°F. Grease and flour 13 x 9 x 2-inch baking pan.

For Cake:
Stir baking soda into buttermilk in medium bowl until dissolved; set aside.
In large bowl, stir together flour, 1 cup sugar, cocoa, and salt. Add oil, buttermilk mixture, egg yolks, and vanilla and beat until smooth.
In small bowl, beat egg whites until soft peaks form; gradually add remaining 1/2 cup sugar, beating until stiff peaks form.
Gently fold egg whites into chocolate batter. Pour batter into prepared pan.
Bake 30 to 35 minutes or until cake springs back when touched lightly in center. Cool in pan.

For Cherry Sauce:
In medium saucepan, stir together reserved cherry liquid, cherry liqueur, sugar, cornstarch, and salt. Cook over medium heat, stirring constantly, until mixture boils, about 1 minute. Remove from heat and add cherries and orange peel.

Serve cake with a scoop of ice cream and Cherry Sauce spooned over the top.

CHOCOLATE CHERRIES JUBILEE

Ingredients
1/2 cup dark cherry preserves (I love Bonne Maman)
1/8 teaspoon cinnamon
3 Tbsp Cognac or Kirsh

1 pint chocolate chocolate chip ice cream

Directions
Melt preserves in heavy small saucepan over low heat, stirring frequently. Mix in cinnamon and Cognac.
Scoop ice cream into bowls. Spoon sauce over (you can ignite it for special effects and then pour :-).

Thursday, September 23, 2021

CHOCOLATE PERSIMMON BREAD PUDDING: Fall Equinox

Fall Equinox. This recipe for Chocolate Persimmon Bread Pudding is the perfect Autumn dessert, and there are lots of persimmons at the farmer's market (and on my neighbors' trees) right now. My favorites are Fuyu Persimmons.

Because I love Persimmon Bread Pudding, I thought I'd post this delicious and easy recipe adapted from Whole Foods for Chocolate Persimmon Bread Pudding. Be sure to use Fuyu Persimmons (not Hachiya).

CHOCOLATE PERSIMMON BREAD PUDDING

Ingredients
4 cups half-and-half
3/4 cup sugar
1/4 cup unsweetened DARK cocoa powder
4 eggs
1 Tbsp pure vanilla extract
1 loaf challah, cut into 1-inch cubes (this also works well with a Brioche loaf)
1 cup chocolate chips  (dark or milk chocolate)
2 ripe fuyu persimmons, quartered and cut into 1/4-inch slices

Directions
Preheat oven to 350°F.
Combine half-and-half with sugar, cocoa powder, eggs, and vanilla in large mixing bowl, whisking until smooth.
Add challah, toss to coat, and set aside to let soak for 15 minutes.
Pour two-thirds of challah mixture into buttered 9 x 13 inch baking dish and sprinkle with 1/2 cup of chocolate chips (or chocolate chunks) and all of the persimmons.
Top with remaining challah mixture and remaining 1/2 cup chocolate chips.
Place dish into water bath (large roasting pan and add hot water to the roasting pan until it reaches about 1 inch up the sides of the dish).
Bake for 40 minutes, then set aside to let cool, leaving dish in water bath.
Once cool, remove dish from water bath then cut pudding into squares and serve.

Wednesday, September 22, 2021

WHITE CHOCOLATE LEMON TRUFFLES: National White Chocolate Day!

Today is White Chocolate Day.  I've always liked white chocolate. When I was growing up, there were two special treats we used to buy at a favorite candy shop on the Boardwalk in Atlantic City: Toffee (English toffee) and White Chocolate. These were grown-up candies that were fresh and put into small individual boxes. As a child of 8 or 9, I was thrilled with these candies-so different from penny candy or a 5 cent candy bar.

Officially white chocolate is not chocolate because it doesn't contain chocolate liquor, although that status seems to be changing. White Chocolate does contain cocoa butter (along with sugar, milk solids, vanilla and lecithin). The most important thing to remember when buying real white chocolate is that it must contain cocoa butter. Some brands on the market, and many of those little disks you see, are really just vegetable fat. Real cocoa butter should be an ivory color. The 'fake' white chocolate is 'white'. Why bother with that. Go for the real thing. You'll be rewarded by flavor!

One other hint: White chocolate scorches easily, so always use a low heat. In the truffle recipe below, be very careful when combining the white chocolate with the cream (see note). 

So for White Chocolate Day here's an easy recipe for White Chocolate Lemon Truffles.

WHITE CHOCOLATE LEMON TRUFFLES

Ingredients 
1/4 cup unsalted butter
Zest of 1 Meyer lemon
3 Tbsp heavy cream
1 cup quality white chocolate, chopped
1/2 tsp lemon extract or pure lemon oil
1/4 cup sparkling sugar (sanding sugar) for coating

Directions
Put white chocolate in bowl, set aside.
Melt butter along with lemon zest in small saucepan. Stir in cream and heat until bubbles just start to form at edges (do not boil).
Pour hot cream mixture over white chocolate. Add lemon extract and stir until smooth.
Cover mixture and refrigerate 2 hours or until firm enough to handle.
Scoop mixture out by heaping teaspoon fulls and form into balls.
Roll in sparkling sugar.
Freeze truffles 20 minutes or refrigerate one hour. Take out of refrigerator before serving.

Tuesday, September 21, 2021

DOUBLE CHOCOLATE PECAN COOKIES: National Pecan Cookie Day!

Pecans and chocolate are a true marriage made in heaven! I've posted recipes for Chocolate Pecan Sandies, definitely a pecan cookie, but I thought I'd post a different one to celebrate National Pecan Cookie Day!

This recipe is adapted from Woman's Day, April 1, 2006. As always, I suggest you use the very best ingredients. I use crumbled toffee in the recipe, and I use 15 ounces of 70% chocolate in place of the original 2 10-oz milk chocolate bars. I also use DARK cocoa. And, an FYI, there are over 1000 varieties of pecans. Whichever you choose, you'll go nuts for this recipe!

DOUBLE CHOCOLATE PECAN COOKIES

Ingredients
1 cup unsalted butter, softened
2⁄3 cup packed light brown sugar
2⁄3 cup granulated sugar
2 tsp vanilla extract
2 large eggs
3⁄4 tsp baking soda
3⁄4 tsp salt
2 1⁄3 cups all-purpose flour
2⁄3 cup unsweetened DARK cocoa powder
10 oz English toffee bits
1-1⁄2 cups coarsely chopped pecans
15-oz dark chocolate (70% cacao), chopped coarsely (or dark chocolate chips)

Directions
Heat oven to 375°F. Have baking sheets ready.
Beat butter, sugars, and vanilla in large bowl with mixer on medium speed 1 to 2 minutes until fluffy. Beat in eggs, baking soda, and salt until combined. Add flour and beat on low speed until blended.
Stir in cocoa powder,  English toffee bits, pecans, and chocolate.
Drop rounded tablespoons dough about 1 1⁄2 inches apart on ungreased baking sheets.
Bake 8 to 9 minutes until edges are golden brown.
Cool on sheet 1 to 2 minutes before removing to wire rack to cool completely.

Sunday, September 19, 2021

CHOCOLATE BUTTERSCOTCH PUDDING MUG CAKE: National Butterscotch Pudding Day!

Today is National Butterscotch Pudding Day, and of course, it's even better with Chocolate. You can make Butterscotch Pudding from scratch or you can use a Box Mix. Add some chocolate chips.

Want to make something more fun to celebrate the day? Try this adaptation from Rachael Ray for Chocolate Butterscotch Pudding Mug Cake. It's a different Cake in a Mug recipe. Under five minutes in the microwave!

Chocolate Butterscotch Pudding Mug Cake

Ingredients
1 egg
3 Tbsp milk
3 Tbsp Canola oil
1/8 tsp vanilla extract
1/8 tsp baking powder
4 Tbsp light brown sugar
2 Tbsp instant butterscotch pudding powder
4 Tbsp all purpose flour
2 Tbsp dark bittersweet chocolate chips
  
Optional Frosting:
1 box of prepared butterscotch pudding mixed with store bought chocolate frosting

Directions
Prepare mug by coating inside lightly with cooking spray. Pour all dry ingredients into bowl.
Beat egg first with spoon and mix in other liquid ingredients.
Add dry ingredients and chocolate chips and mix until you’ve removed all lumps.
Pour batter into mug (don't fill more than halfway) and smooth top with spoon.
Thump mug firmly on tabletop six times to remove excess air bubbles.
Place mug on top of microwaveable small plate or saucer.
Bake for 3-4 minutes. Check for doneness by inserting a toothpick in middle of microwave mug cake and removing toothpick. If toothpick is dry, mug cake is done.
Wait two minutes then run butter knife along inside of mug and tip cake into plate.
Position mug cake so slightly rounded top is on top.  

Optional: Frost whole chocolate chip butterscotch microwave mug cake with prepared butterscotch pudding chocolate frosting. I prefer to dust with a little powdered sugar. The cake is already pretty rich!

Saturday, September 18, 2021

CHOCOLATE FUN-FEST CAKE: Retro Ad with Recipe

Can't believe how many Retro Ads with Recipes there were. Here's another for Chocolate Fun-Fest Cake from Baker's Chocolate. As always, you can change up the ingredients for a more 2021 interpretation. 


Thursday, September 16, 2021

CHOCOLATE CHIP NOODLE KUGEL: Yom Kippur or any time!

Today is the Jewish holiday of Yom Kippur, the Day of Atonement, so this recipe may come too late, but since many people are home because of Covid19, they might get a chance to make this for the Breaking of the Fast. It's quick and easy. Or save this recipe for another time.  I love this Chocolate Chip Noodle Kugel  (aka Noodle Pudding).

A bit of  history about Kugel. Kugel is a traditional Ashkenazic Jewish dessert or side dish. Kugel is Yiddish for ball, but it is sometimes translated as pudding or casserole, and related to the German Gugelhupf. The first Kugel were plain -- made from bread and flour, and salty rather than sweet. About 800 years ago, the flavor and popularity changed when cooks in Germany replaced bread mixtures with noodles or farfel. Eventually eggs were incorporated. The addition of cottage cheese and milk created a custard-like consistency which is common for today's dishes. In the 17th century, sugar was introduced, which gave the option of serving kugel as a side dish or dessert. In Poland, Jewish women sprinkled raisins and cinnamon into recipes. Hungarians took the dessert concept further with a hefty helping of sugar and sour cream.

Today many people add corn flakes, graham cracker crumbs, ground gingersnaps, or caramelized sugar on top. Some people layer the dish with sliced pineapples or apricot jam, but since this is a chocolate blog, here's a recipe that includes chocolate chips! Enjoy this for the Breaking of the Fast or any time!

Chocolate Chip Noodle Kugel

Ingredients:
12 oz pkg medium wide noodles boiled & drained
4 Tbsp unsalted butter, melted
8 eggs
3/4 cup sugar
1 pint (16 oz) cottage cheese (large curd)
2 cups sour cream
1 tsp pure vanilla
3/4 cup chocolate chips

Directions:
Preheat oven to 350.
Butter sides and bottom of 9 x 13 Pyrex or another Pan.
Beat together eggs and sugar. Add cottage cheese, sour cream, melted butter, and vanilla, and mix with wooden spoon.
Fold in noodles and chocolate chips.
Pour mixture into buttered pan.
Bake at 350°F for 40-60 minutes until just set.

Wednesday, September 15, 2021

MEXICAN HOT CHOCOLATE: Yom Kippur, Crypto-Jews, and Mexico

The drinking or eating of Mexican Chocolate on Yom Kippur (at the pre-fast meal and at the breaking of the fast) has its roots in the Inquisition in 17th century New World Mexico. According to Rabbi Deborah R. Prinz, Crypto-Jews lived in Mexico in the 17th century, under the surveillance of the Inquisition. They developed subterfuges to avoid being discovered for their undercover Jewish practices, including those related to chocolate eating and drinking. They also took an active role in the cacao trade.

Read More Here.

Rabbi Deborah R. Prinz lectures about chocolate and Jews around the world. Her book, On the Chocolate Trail: A Delicious Adventure Connecting Jews, Religions, History, Travel, Rituals and Recipes to the Magic of Cacao, was published in 2013 by Jewish Lights and is in its second printing.

Mexican Hot Chocolate 
(a pareve version would have been used in the seventeenth-century)
Serves 8

Ingredients
4 ounces unsweetened chocolate
4 cups milk
2 cups heavy cream
3⁄4 cup sugar
1 teaspoon ancho chile powder (or to taste)
1 teaspoon chipotle chile powder (or to taste)
1 tablespoon ground cinnamon
1⁄2 teaspoon ground cloves
1 tablespoon Mexican vanilla extract

Directions
Melt chocolate in large bowl over simmering pan of water.
In separate heavy saucepan, heat milk and cream on low until hot, but not boiling.
Add 3 tablespoons of hot milk to chocolate in bowl and mix well.
Stir rest of  milk mixture, sugar, chile powders, cinnamon, cloves, and vanilla into chocolate.
Whisk chocolate briskly for 3 minutes, over double boiler to thicken.

Tuesday, September 14, 2021

TV DINNERS: History & Recipe for TV Dinner Buttermilk Brownies

Oh no! I forgot National TV Dinner Day on September 10! 

When I was growing up, the idea of eating in front of a TV was a foreign concept to my family. We weren't allowed to have TV dinners for so many reasons. I saw them advertised on TV and in the magazines, but dinner was a sacred time for our family. We ate promptly at 5:30. (I learned later that that was really early for dinner.) From 5:30-6:00 no one answered the phone; everyone was at the table. My father, a pediatrician, had to call his 'exchange' and sign out for the half hour. My mother insisted.

And, as far as frozen ingredients in a TV Dinner? Never. My mother shopped every day for fresh meat, fish, and bread. I know we had a freezer in the utility room when I was little and in the garage later, but that was for meat or fish she purchased fresh. No TV Dinners at our house.

Event if TV dinners had been allowed at our home, I would have been the only one who wanted to eat dinner off a tray in front of the TV. My father might have wanted to watch Westerns or Cop shows, but they weren't on at 5:30, anyway. My sister would have loved to bring a book to dinner, but that, too, was banned. It was family time -- a time to talk about the highlights and problems of the day, politics, and current events.

But back to National TV Dinner Day. Here's a bit of history. Swanson TV Dinners were introduced in the U.S. in 1953. Seven years later, the company stopped calling them TV dinners because they didn't want to discourage people from eating their meals anytime. The generic title TV Dinners, though, did not disappear.

The original TV dinners were on foil trays with foil wrapping and little sections delineated in the tray for different foods. You just heated the entire tray in the oven. O.K. you're saying why not the microwave? Because there weren't any microwaves at that time. The TV dinner--heat and serve-- was new and innovative.

According to Wikipedia, the first Swanson-brand TV Dinner produced in the United States was a Thanksgiving meal of turkey, cornbread dressing, frozen peas and sweet potatoes packaged in a tray like those used at the time for airline food service. The trays proved to be useful: the entire dinner could be removed from the outer packaging as a unit; the aluminum tray could be heated directly in the oven without any extra dishes; and one could eat the meal directly from the same tray. The product was cooked for 25 minutes at 425°F and fit nicely on a TV tray table. The original TV Dinner sold for 98 cents, and had a production estimate of 5,000 dinners for the first year. Swanson far exceeded its expectations, and ended up selling more than 10 million of these dinners in the first year of production. 

FYI: The early TV dinners did not have dessert, but that changed in 1960 and sometimes there was an Apple Brown Betty, chocolate pudding, or a brownie.

Other brands followed suit, but not for some time. There were Swanson TV Dinners and Bird's Eye TV Dinners. Now, of course, we have lots of prepared meals that can be nuked in the microwave or baked in the oven. It's all about convenience. On the commercial side, Marie Callendar, Claim Jumpers, Banquet, Stouffers, Heatlhy Choice, Lean Cuisine and Hungry Man (Swansons) sell full dinners, but I've never tried them. It's just not the same. There was something so futuristic about the TV Dinner in the tiny foil tray that intrigued me.

This recipe for TV Dinner Buttermilk Brownies is reminiscent of the TV Dinner Brownie on the tray. These Brownies are cake-like with icing, so they might not be your brownie of choice, but they're tasty. Here's a blast from the past.

TV DINNER BUTTERMILK BROWNIES

 Ingredients
1 cup unsalted butter
1/4 cup unsweetened DARK cocoa
1 cup water
2 cups sugar
2 cups all-purpose flour
1/2 teaspoon salt
1/2 cup buttermilk
1 teaspoon baking soda
2 eggs, beaten
1 teaspoon vanilla extract

Frosting
1/2 cup butter or margarine
1/4 cup unsweetened DARK cocoa
1/4 cup buttermilk
1 pound confectioners' sugar
1 teaspoon vanilla extract
Pinch of salt

Directions
In saucepan, bring butter, cocoa, and water to a boil. Cool.
In large mixing bowl, combine sugar, flour, and salt.
Pour cocoa mixture over dry ingredients; mix well.
Combine buttermilk and baking soda; add to batter along with eggs, vanilla.
Mix until well combined.
Pour into greased 15 x 10 x1 greased and floured baking pan.
Bake at 350 for 20 minutes.
Frosting: Melt butter, cocoa and buttermilk in a saucepan. Stir in sugar, vanilla and salt. Spread over warm brownies.

Monday, September 13, 2021

CHOCOLATE PEANUT BUTTER WHOOPIE PIES: National Peanut Day!

Today is National Peanut Day. I have many fond memories of the Peanut. My nickname as a child was Peanut. Only one person called me that, but she was so special to me. She was address me as Peanut and chuckle.

I also loved Mr. Peanut. I couldn't wait to see him when we went down the shore. Mr. Peanut would walk the boards, shaking hands with all and sundry. I'm sure I believed he was a large peanut.... but that's another post. So if you want to celebrate National Peanut Day, eat some chocolate covered peanuts. It's easy to dip them in chocolate.. of course, remove the shell. The saltiness of the peanuts goes so well with dark chocolate.

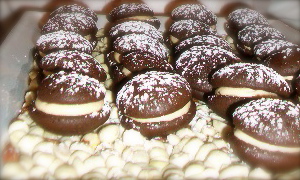
But if you want to take it a step further, mke this recipe for Chocolate Peanut Butter Whoopie Pies and serve them on a bed of salted peanuts!. I love Whoopie Pies whatever their origin. See a previous post on Whoopie Pies. The following recipe is from Martha Stewart's recipe for miniature Peanut Butter Whoopie Pies. As always use the very best chocolate, and in this case the best cocoa, too. Same goes for the peanut butter. The better the products, the better the taste.

Here's a tip for Presentation: Serve the Chocolate Peanut Butter Whoopie Pies on a bed of peanuts. And, you can also sprinkle the Whoopie Pies with confectionary sugar!

Chocolate Peanut Butter Whoopie Pies

For the Cookies:
1 - 3/4 cups all-purpose flour
3/4 cup unsweetened DARK cocoa powder, not Dutch-process  (I use Ghirardelli)
1- 1/2 teaspoons baking soda
1/2 teaspoon coarse salt (Kosher salt)
1 tablespoon unsalted butter, softened
1/4 cup vegetable shortening
1/2 cup granulated sugar
1/2 cup packed dark-brown sugar
1 large egg
1 cup whole milk
1 teaspoon pure vanilla extract

For the Filling:
2/3 cup natural, creamy peanut butter
1/2 cup umsalted butter, softened
3/4 cup confectioners' sugar
Coarse salt, optional

Directions
Make cookies: Preheat oven to 375 degrees. Sift together flour, cocoa powder, baking soda, and salt in small bowl; set aside.
Put butter, shortening, and sugars in bowl of electric mixer fitted with the paddle attachment. Mix on high speed until smooth, about 3 minutes. Add egg; mix until pale and fluffy, about 2 minutes. Mix in half flour mixture, then milk, and vanilla. Mix in remaining flour mixture.
Drop rounded tablespoons of dough onto baking sheets lined with parchment paper, spacing 2 inches apart. Bake until cookies spring back when lightly touched, 12 to 14 minutes. Let cool on sheets on wire racks 10 minutes. Transfer cookies to wire racks using a spatula; let cool completely.

Or you can use a Whoopie Pie Pan (I have several): Whoopie Pie Pan post

Make filling: Put peanut butter and butter in bowl of electric mixer fitted with paddle attachment. Mix on high speed until smooth. Reduce mixer speed to low. Add confectioners' sugar; mix until combined. Raise speed to high, and mix until fluffy and smooth, about 3 minutes. Season with salt, if desired.

Assemble cookies: Spread 1 scant tablespoon filling on bottom of 1 cookie. Sandwich with another cookie. Repeat with remaining cookies and filling. Cookies can be refrigerated in single layers in airtight containers up to 3 days. Bring to room temperature before serving.

Sunday, September 12, 2021

IRISH COFFEE CHOCOLATE MILKSHAKE: National Chocolate Milk Shake Day!

Here's an Adult Version of a Chocolate Milkshake for National Chocolate Milkshake Day: Irish Coffee Chocolate Milkshake. Don't want alcohol in your drink? Scroll down for an easy non-alcoholic Chocolate Coffee Milkshake.

Irish Coffee Chocolate Milkshake

Ingredients
4 ounces dark chocolate, chopped
6 scoops coffee ice cream
2 Tbsp milk
1 ounce Irish Whisky

Directions
Peel chocolate to have some shavings to garnish milkshake.
Combine ice cream, milk, and whisky in blender. Process until smooth
Stir in chopped chocolate.
Garnish with chocolate curls.

Non-Alcoholic Chocolate Coffee Milkshake

Ingredients
1-1/2 cup chocolate ice cream
1/4 cup strong coffee or espresso (already made)
1/4 cup milk
Pinch cocoa powder

Directions
Put all ingredients except cocoa in blender. Blend on high until smooth and frothy. Pour into glasses. Sprinkle with cocoa.

Saturday, September 11, 2021

MAGIC COOKIE BARS: Retro Ad with Recipe!

I love old Retro Ads with recipes. Here's a great one from Borden's Eagle Brand for Magic Cookie Bars. These are great for school lunches, after school treats, or just about any time. You can add chocolate chips, coconut, nuts, mini-marshmallow, or M&Ms. These are quick and easy. As always, use the very best chocolate!


Friday, September 10, 2021

BAKING WITH HONEY: Tips & Honey Chocolate Chip Cookie Recipe

Over the years, I've posted several chocolate honey recipes, but since September is Honey Month, I thought it might be good to post some Baking with Honey Tips, particularly when substituting honey for sugar. Of course, you can just find a recipe that uses honey, so you don't need to think about it. But, sometimes, you just want to try a recipe and you prefer using honey. I know I do.

Baking with Honey

1. Generally you can substitute 2/3 cup honey for each cup of sugar in a recipe, but you'll probably want to reduce the amount of liquid by 1/4 cup for each cup of honey.

2. If you're baking, you'll want to reduce the heat by about 25 degrees to prevent burning.

3. And, here's one you might not know. If you're substituting honey in baking, add 1/2 tsp baking soda for each cup honey used.

From the Empire State Honey Producers comes this recipe (slightly adapted) for Honey Chocolate Chip Cookies

Honey Chocolate Chip Cookies 

Ingredients
1/2 cup local honey
1/2 cup unsalted butter
1 egg
1/2 tsp Madagascar vanilla
1-1/2 C flour
1/2 tsp baking soda
1/4 tsp baking powder
1/2 tsp Salt
1 cup chocolate chips
1/2 cup chopped or ground walnuts (optional)

Directions
Cream honey and butter together. Add egg and vanilla.
In bowl, sift flour, baking soda, baking powder, and salt together. Add to wet honey mixture. Mix.
Fold in nuts and chocolate chips. Stir slightly.
Drop onto cookie sheet and bake at 350 for 10-12 minutes.

Wednesday, September 8, 2021

DATE NUT BREAD WITH CHOCOLATE CHIPS: Retro Ad & Recipe for National Date Nut Bread Day!

Dromedary Date Nut Bread (in a can) had a Jingle Contest in 1940 to win nylon hose. Here's both the Retro Advertisement and the recipe!
 
This is perfect for today's food holiday: Date Nut Bread Day. Has this wonderful quick bread fallen out of favor? I think not. It's a great bread to smother with cream cheese or marscapone. Date Nut Bread makes fabulous sandwiches. It's also great toasted and smeared with unsalted butter. Add some chocolate chips or chunks to the recipe, and it belongs on this blog!

This wonderful advertisement from 1940 not only reflects the popularity of this quick bread in the U.S., but it's an historical testament to nylon hose and prepared foods at that time. Want to sell a product in the 1940s? Appeal to women. To win a pair of nylons, all you needed to do was finish the jingle. 1000 lucky women won nylons.
In 1939  DuPont introduced nylon stockings at the New York World's Fair, whose theme was the "World of Tomorrow." DuPont then went into full scale production, and "by May 1940, nylon hose was a huge success and women lined up at stores across the county to obtain the precious goods." Just an FYI, nylon went to war in 1942  to be used as parachutes and tents (as silk had been before nylon) and became in short supply.

Dromedary Date Nut Bread in a Can is no longer in production, but isn't the concept and advertisement fabulous? I used to bake a lot of quick breads in a can, but I never saw any ready baked in a can. FYI: Dromedary Date-Nut Bread in a can did not contain chocolate.

Dromedary Dates, which were also sold at the market, had a recipe on the back of the package for Date-Nut Bread. Here's a recipe that's pretty close to the original Dromedary Date-Nut Bread Recipe -- with the addition of Chocolate Chips. If you want your finished Date Nut Bread to look similar to the ad above, bake the date-nut breads in 4 soup cans!

DATE NUT BREAD WITH CHOCOLATE CHIPS

Ingredients
3/4 cup coarsely chopped walnuts
1 cup chopped pitted dates (Dromedary chopped dates from the original recipe- one package-8 ounces-equals 2 cups)
1 1/2 tsp baking soda
1/2 tsp salt
3 Tbsp oil  (or 3 tbsp melted butter-original recipe mentions margarine, but I don't use margarine)
3/4 cup boiling water
2 eggs
1 tsp vanilla
1 cup sugar
1 1/2 cup sifted flour, unbleached
1/2 cup dark chopped chocolate chips

Directions
Preheat oven to 350.
With fork, mix walnuts, dates, soda, and salt in bowl.
Add oil and boiling water. Let stand 20 minutes.
With fork, beat eggs slightly, add vanilla.
Stir in sugar and sifted flour.
Mix in date mixture.
Fold in chocolate chips.
Do Not Overmix.
Place in greased 9x5x3 inch loaf pan (or coffee can or 4 soup cans).
Bake at 350 for 1 hour until toothpick inserted in center comes out clean.
Cool in pan 10 minutes.
Move to wire rack to finish cooling.

Tuesday, September 7, 2021

WHITE CHOCOLATE ANGEL FOOD CAKE: White After Labor Day!

White after Labor Day? Yes, when it's White Chocolate Angel Food Cake. Here's a great recipe from Godiva Chocolate. This is perfect for those warm early Fall days.

White Chocolate Angel Food Cake with Whipped Cream and Fresh Berries

Cake:
1 1/2 cups sifted confectioners’ sugar
1 cup sifted cake flour
1/4 teaspoon salt
1 1/2 cups egg whites, at room temperature (about 11 to 12 large eggs)
1 1/2 teaspoons cream of tartar
1 cup granulated sugar
1 teaspoon vanilla extract
4 bars (1.5 ounces each) Godiva Ivory Chocolate, grated or finely chopped

Whipped Cream:
2 cups heavy cream, chilled
2 tablespoons granulated sugar
1 1/2 teaspoons pure vanilla extract

Berries:
1 cup fresh red raspberries
1 cup fresh blueberries
1 cup fresh strawberries, sliced
1/2 cup fresh blackberries
White chocolate curls 

Make The Cake:
Position oven rack in lower third of oven. Heat oven to 350°F.
Sift together confectioners sugar, cake flour, and salt onto a sheet of waxed paper.
Place egg whites in clean, dry bowl of electric mixer. Beat egg whites at medium-low speed until frothy. Add cream of tartar and beat at medium speed until soft peaks form. Gradually add granulated sugar in steady stream, beating just until whites are thick and form slightly stiff peaks. (Do not over-beat)
Gently fold in 1/3 of sifted dry ingredients over whites just until dry ingredients are moistened. Fold in remaining dry ingredients with vanilla and grated white chocolate in two additional batches.
Gently pour batter into ungreased 10" angel food or tube pan, spreading evenly. Tap gently on counter to remove any air bubbles. Bake 35 minutes or until top is firm and springs back when lightly touched. Invert pan on a large bottle (such as wine bottle or olive oil bottle) and cool completely.
To remove cake from pan, run long knife or thin metal spatula around outside edge of cake and gently remove side portion of pan. Then, run knife around inside of center tube, loosen bottom of cake with long knife or thin metal spatula and remove cake from remaining portion of pan. Place on cake plate; cover with plastic wrap if not serving immediately.

Make Whipped Cream:
Combine heavy cream and granulated sugar in a medium, chilled bowl. Beat at medium speed with electric mixer until soft peaks form; whisk in vanilla.
Place sweetened whipping cream in refrigerator until ready to serve cake, up to 2 hours.
Combine berries in a medium bowl and toss lightly.

Assembly:
Cut cake with serrated knife using a sawing motion. Serve with sweetened whipped cream and berry mixture. Garnish with white chocolate curls.


Monday, September 6, 2021

COFFEE ICE CREAM PIE: National Coffee Ice Cream Day!


Warm where you are today? Here's an easy (20 minutes to make - and then freeze) no-bake recipe that has a great chocolate cookie crust that includes coconut and chopped nuts along with the chocolate wafers. It's a very versatile crust and would also be great with a key lime filling, as well as any other ice cream flavor. This recipe is adapted  slightly from Pillsbury. As I've mentioned many times, the big 'food product' sites often have fabulous recipes. You can adapt and update as you like, and they're a springboard for ideas, so be sure and check them out!

COFFEE ICE CREAM PIE

Ingredients
30 chocolate wafers, crushed (about 1-1/2 cups)
1/2 cup butter, softened
1/4 cup coconut  (I like toasted coconut)
3 Tbsp finely chopped macadamia nuts (or cashews)

Filling 
1 quart coffee ice cream, slightly softened

Topping 
1 cup hot fudge sauce, warmed
Whole macadamia nuts (or cashews), if desired

Directions
In medium bowl, mix crushed chocolate wafers, butter, coconut, and finely chopped macadamia nuts.
Press mixture in bottom and side of 9-inch glass pie plate; refrigerate 15 minutes.
Carefully spoon softened ice cream into chilled crust.
Cover and freeze about 2 hours or until firm.
Top individual servings with fudge sauce, chopped macadamia nuts, and chopped chocolate covered coffee beans.
Cover and freeze any remaining pie.

To make cutting the pie easier, remove it from the freezer about 10 to 15 minutes before serving. 

Sunday, September 5, 2021

CHOCOLATE CHIP APPLE BUNDT CAKE: Rosh Hashanah


I love Fall with its infinite variety of apples.  Here's a great way to make the most of the apple harvest. This fabulous Chocolate Chip Apple Bundt Cake (recipe originally from Sunset Magazine) is a great way to celebrate  Rosh Hashana. We all need a sweet new year!

I use tart apples in this recipe because I like the combination of tart and sweet. Try different apple varieties. Also, you can use your favorite dark chocolate instead of chocolate chips. Chop into chunks.

Chocolate Chip Apple Bundt Cake

Ingredients 
1 cup unsalted butter, softened
1 1/2 cups white sugar
3 eggs
1/2 cup water
1 Tbsp vanilla extract
2 1/2 cups all-purpose flour
2 Tbsp unsweetened cocoa powder
1 tsp baking soda
1 tsp ground cinnamon
1 tsp ground nutmeg
2 cups apples - peeled, cored and diced
1 cup semisweet chocolate chips (or chocolate chunks)

Directions
Preheat oven to 325 degrees F.
Grease and flour one 9 or 10 inch Bundt Pan.
In large bowl, cream butter with sugar. Beat in eggs. Add water and vanilla.
Stir flour, cocoa, baking soda, ground cinnamon, and ground nutmeg together. Beat this mixture into creamed mixture.
Fold in chopped apples and semisweet chocolate chips (or chocolate chocolate chunks).
Pour batter into prepared pan.
Bake at 325 degrees F for 1 hour and 15 minutes or until cake tests done when toothpick is inserted near center. Do not overbake. Start checking at one hour.
Transfer to a rack to cool.

Saturday, September 4, 2021

CHOCOLATE CHOCOLATE CHIP MACADAMIA NUT COOKIES: National Macadamia Nut Day!

Today is National Macadamia Nut Day, and what could be more perfect that Chocolate Chocolate Chip Macadamia Nut Cookies. These cookies are chewy, and since the nuts are slightly salted, you'll really taste the chocolate! I use two kinds of chocolate chips, but you also use white chocolate chips. Macadamia Nuts remind me of Hawaii, so if you want to make these cookies more 'Hawaiian", add some dried coconut to the batter, too. Yum!

Chocolate Chocolate Chip Macadamia Nut Cookies 

Ingredients
1/2 cup unsalted butter, softened
2/3 cup brown sugar
1/3 cup white sugar
1 egg
1 1/2 tsp pure vanilla extract
1/2 tsp baking soda
1/4 tsp salt
1/4 tsp espresso powder
1 cup + 2 Tbsp all purpose flour
1/3 cup dark chocolate cocoa powder
1/2 cup roasted and salted macadamia nuts, chopped
1/2 cup dark chocolate chips
1/2 cup milk chocolate chips

Directions
Preheat oven to 350 degrees. Line cookie sheet with parchment paper.
In large bowl, beat butter (with hand mixer or standing mixer) until light and fluffy. Add in brown sugar and granulated. Beat until well combined.
Add in egg and vanilla extract. Beat until combined. Add in salt, espresso powder, and baking soda; mix until combined.
In separate bowl, mix flour and cocoa powder together. Slowly incorporate dry ingredients into wet ingredients, mixing until combined.
Add in macadamia nuts, and chocolate chips. Mix until combined.
With medium cookie scoop, scoop dough and spread evenly on cookie sheets, about 2 inches apart. Bake 15-16 minutes.
These cookies are fudgy.

Friday, September 3, 2021

POMEGRANATE FUDGE: Rosh Hashana

Here's another chocolate recipe for Rosh Hashana, the Jewish New Year. Even if you don't celebrate this holiday, you'll want to bookmark this easy recipe. I use dark chocolate, but milk chocolate works well, too. I buy my pomegranate seeds at Trader Joe's, but you may want to buy a whole pomegranate and de-seed it. As I've said before, use the very best ingredients for the best flavor!

On the second day of Rosh Hashana, it's traditional to eat a fruit you haven't had this season. Pomegranates are often the 'preferred' fruit, because they also symbolize fruitfulness. The pomegranate is also said to have 613 seeds which corresponds with the 613 commandments of the Torah.

Pomegranate Fudge

Ingredients
23 ounces Chocolate, chopped  (65-70% cacao) or dark chocolate chips (or milk chocolate, if you prefer)
14 ounces Sweetened Condensed Milk
1/4 cup Pomegranate Molasses
1/2 tsp Sea Salt (fleur de sel)
Seeds of 1 Pomegranate (about a cup or 5 1/3 ounces if you're buying them loose)

Directions
Line pan that is at least 7 x 7 and 2 inches high with parchment paper.
In saucepan over saucepan over simmering water, combine chocolate and condensed milk. Stirring constantly.
Remove from stove and mix in pomegranate molasses. Mix in 1/4 teaspoon sea salt.
Pour fudge into parchment-lined pan, smoothing with spatula.
Spread pomegranate seeds over top of fudge and gently pat into fudge so they stick to fudge as it cools.
Add another 1/4 teaspoon of sea salt over top of fudge.
Put in refrigerator to set.
Remove from refrigerator.
Cut and eat.

Thursday, September 2, 2021

CHOCOLATE HONEY CAKE for a sweet New Year: Rosh Hashanah

Here's a wonderful recipe for Chocolate Honey Cake to celebrate Rosh Hashana, the Jewish New Year. Honey is a traditional food that symbolizes a Sweet New Year. Add Chocolate, and the year is bound to be even sweeter! Heaven knows, we need it to be!

This recipe is adapted from Nigella Lawson's Chocolate Honey Cake aka Honey Bee Cake. She decorates her Chocolate Honey Cake with the most adorable marzipan bees, but I never get quite that involved.

FYI: Honey cake doesn't have to be dry and heavy. This cake is incredibly moist! As I've mentioned many times, though, your final product will be different depending on the type and brand of chocolate and the type of honey you use.

Chocolate Honey Cake

Ingredients

Cake:
4 ounces dark chocolate (50-65% cacao), chopped
1 1/3 cups soft light brown sugar
8 ounces unsalted butter, softened
1/2 cup local honey
2 eggs
1 1/2 cups all-purpose flour
1 tsp baking soda
1 Tbsp DARK cocoa
1 cup boiling water

Sticky Honey Glaze:
1/4 cup water
1/2 cup honey
6 ounces dark chocolate (60-75% cacao), finely chopped
1/2 cup plus 2 Tbsp confectioners sugar

Directions:
Have all ingredients at room temperature.
Melt chocolate from cake part of ingredients list in large bowl, either in microwave or bowl over pan of simmering water. Set aside to cool slightly.
Preheat oven to 350 degrees F. Butter and line 9-inch springform pan.
Beat together sugar and softened butter until airy and creamy, and then add honey.
Add 1 of eggs, beating in with tablespoon of flour, and then second egg with another tablespoon of flour.
Fold in melted chocolate, and then remaining flour and baking soda.
Add cocoa pushed through tea strainer to ensure no lumps, and last of all, beat in the boiling water.
Mix everything together well to make smooth batter and pour into prepared springform pan.
Bake for up to 1 -1/2 hours, checking cake after 45 minutes. If it's getting too dark, cover top lightly with aluminum foil and keep checking every 15 minutes.
Let cake cool completely in pan on rack.

Glaze: 
To make glaze, bring water and honey to boil in pot, then turn off the heat and add finely chopped chocolate, swirling around to melt in hot liquid.
Leave for few minutes, then whisk together.
Add sugar through sieve and whisk again until smooth.

Putting it together:
Choose plate or stand, and cut 4 strips of parchment paper and form square outline on plate. Reason: So when you put cake on it and ice it, icing won't run all over the plate (you can always cut the excess off later).
Unclip springform pan and set thoroughly cooled cake on prepared plate.

Pour glaze over cold chocolate honey cake. It might dribble a bit down the edges, but don't worry too much about it. Glaze stays tacky for some time (which is what gives it its melting goeyness) so ice in time for glaze to harden a little, at least an hour before you want to serve it.

Nigella Lawson decorates this great cake with marzipan bees. For the recipe for them, and for her exact recipe, go HERE.

Wednesday, September 1, 2021

HONEY CHOCOLATE BROWNIES: National Honey Month

September is National Honey Month. I'm a huge fan of HONEY. Here's a great recipe for Honey Chocolate Brownies to celebrate. And since Rosh Hashana is also this month, makes these Honey Chocolate Brownies for a sweet New Year.

This Honey Chocolate Brownie recipe won the 2000 Huron County Fair Blue Ribbon. I've adapted it slightly. Just as different cocoa will change the taste of these brownies, so will the honey. Try these brownies with different honey and chocolate combinations.

HONEY CHOCOLATE BROWNIES

Ingredients
1 cup softened unsalted butter
1/2 tsp salt
1 1/2 cups honey
1 cup flour
3 eggs beaten
1 cup chopped walnuts
1 tsp pure vanilla extract
1/3 cup DARK cocoa

Directions
In mixer, beat butter until creamy.
Slowly add honey, mixing constantly.
Add eggs, vanilla, and salt.
Add cocoa.
Add flour.
Fold in nuts.
Make sure the batter is mixed completely.
Pour batter into greased 9x13x2 inch. deep pan and bake at 350 for 30 to 35 minutes.