I found these wonderful 1960sHalloween Cookie (Cooky) Cutters a few years ago at the Alameda Flea Market. Love the box and the shapes.
I've posted some great chocolate cookie recipes, but here's one I adapted from a Martha Stewart recipe. Just a few changes, and since Martha uses this recipe with her own bat and cat cookie cutters, these cookies are great to make with these retro cookie cutters. The chocolate cookies are very crisp. I think using dark cocoa gives them an even richer taste.
Chocolate Cats and Bats, Witches and Brooms: Halloween Cookies
Makes 40 to 50 Ingredients
1 1/2 cups all-purpose flour, (spooned and leveled) plus more for rolling and cutting out dough
3/4 cup unsweetened DARK cocoa powder
1/2 teaspoon salt
12 tablespoons sweet butter, room temperature
1 cup sugar
1 large egg
Small candies or sprinkles, for decorating (optional)
Directions
1. Preheat oven to 350 degrees. In medium bowl, whisk together flour, cocoa, and salt; set aside.
2. In large bowl, with electric mixer, beat butter and sugar until light and fluffy; beat in egg. On low speed, mix in flour mixture. Divide dough in half, and form into 2 disks, each about 3/4 inch thick. Wrap disks in plastic; chill until firm, at least 45 minutes and up to 2 days.
3. On lightly floured sheet of waxed paper, using a floured rolling pin, roll dough 1/4 inch thick. (If dough becomes too soft to work with, refrigerate for a few minutes.)
4. Using 2- to 3-inch Halloween cookie cutters, cut out shapes, dipping cutters in flour as necessary to prevent sticking; place on baking sheet, spacing 1 inch apart.
5. Bake until surface is dry to the touch, 10 to 15 minutes (if decorating, press candies into dough halfway through baking-as in eyes on the cats, etc). Cool cookies 1 to 2 minutes on baking sheet; transfer to rack to cool completely.
This is one of my favorite Halloween recipes. I discovered it a few years ago on allrecipes.com. I've tweaked it a little, and, as always, feel free to do the same. These Chocolate Mice are fabulous! They look adorable. Warning: They can be pretty sweet, but then they're for Halloween! That's why I substituted dark chocolate for milk chocolate in the recipe.
CHOCOLATE MICE
Ingredients
4 ounces dark chocolate - - 65-75% cacao
1/3 cup sour cream
1 cup chocolate cookie crumbs (whirl chocolate wafers in a blender)
2/3 cup chocolate cookie crumbs
24 silver dragees decorating candy (those tiny silver candy balls) or icing gel or pearl candies
1/4 cup sliced almonds (try to match pairs)
12 (2 inch) pieces long thin red vine string licorice
Directions
1. Melt chocolate, and combine with sour cream. Stir in 1 cup chocolate cookie crumbs. Cover and refrigerate until firm.
2. Roll by level tablespoonfuls into balls. Mold to slight point at one end (the nose).
3. Roll dough in chocolate cookie crumbs. On each mouse, place dragees (or other decorating candy or icing) in appropriate spot for eyes (on the sides/not directly at front), almond slices for ears, and a red licorice string for the tail.
4. Refrigerate for at least two hours, until firm.
Place on a bed of graham crackers crumbs or vanilla wafer crumbs or Rice Crispies.
Hint: You can use this recipe to make White Chocolate Mice for Christmas!
Today is National Oatmeal Day, and I can't think of a better way to celebrate than with Oatmeal Chocolate Chunk Cookies! Make sure you use the very best ingredients for the best results. For these cookies, I've used great chocolate from Amano, Guittard, Taza,and Alter Eco, but you can use what you have or like! Just break the bars up into small chunks. Of course, you can always use chocolate chips!
This is an easy recipe that consistently wins the hearts and reaches the tastebuds of friends and family. I've adapted this from myrecipes.com. I like walnuts rather than pecans, and I use sweet European butter, Madagascar vanilla and great dark chocolate.
Oatmeal Chocolate Chunk Cookies
Ingredients
1 cup sweet European butter, softened
1 cup firmly packed brown sugar
1/2 cup granulated sugar
2 large eggs
2 teaspoons vanilla (Madagascar)
2 cups all-purpose flour
1 teaspoon baking soda
1/2 teaspoon salt
3 cups uncooked regular oats
About 11 oz. dark chocolate chopped into chunks
1 cup chopped walnuts
Preparation
1. Preheat oven to 350°.
2. Beat butter and sugars at medium speed with an electric mixer until creamy. Add eggs and vanilla, beating well.
3. Lightly spoon flour into dry measuring cups, and level with a knife. Combine flour, baking soda, and salt in a bowl, stirring well. Add oats; stir well. Add to butter mixture; stir until well blended. Gently fold in chocolate chunks and walnuts.
4. Drop by rounded tablespoons 2 inches apart onto baking sheets lined with parchment paper.
5. Bake at 350° for 10 minutes or until brown around edges. Cool on pan 2 to 3 minutes or until firm. Remove cookies from pan; cool on wire racks.
It's almost Halloween, and this is one of my favorites! S'mores are great all year round, and these Halloween Pumpkin S'mores are fun and easy! Toast some special Pumpkin Spice Mallows for Pumpkin S'mores around the Halloween Bonfire!
Easy Pumpkin S'mores
Ingredients
Hershey's Chocolate Bars (or Dark Chocolate Bars or Pieces)
Pumpkin Spice Mallows
Graham Crackers
Directions
Toast Pumpkin Spice Mallows
Place Toasted Pumpkin Spice Mallows & Chocolate between two Graham Crackers
Microwave for 5 seconds or wrap in foil and place on grill for 2-3 minutes
Today is a celebration! National Chocolate Day!! Well, every day is a chocolate holiday on DyingforChocolate.com, as you probably know by reading this blog. Even holidays that celebrate other foods, usually can include chocolate, and over the years, I've posted so many recipes and reviews!
Today is World Pasta Day, and what better way to celebrate than with this great recipe from a fabulous new cookbook:Melt: The Art of Macaroni and Cheese by Stephanie Stiavetti and Garrett McCord (Little Brown).
I have been waiting for this cookbook! I adore Mac and Cheese, and I knew that Stephanie Stiavetti and Garrett McCord had been collaborating on this fabulous new cookbook that reinvents the American classic of macaroni and cheese. Their recipes showcase gourmet ingredients with handcrafted artisan cheeses. Each recipe is composed of very unique flavor combinations and profiles. You MUST buy this cookbook.
I've posted Chocolate Pasta recipes before, but none compare to the nuances in the cheese/hazelnut/cherries sauce on this one. Chocolate pasta does not have to fall into the sweet category. This is a wonderful savory dish. I'm thrilled that Steph gave the o.k. to include this recipe here. Enjoy!
And, for your 'viewing' enjoyment, I've attached a video of Steph and Garrett at the end. Be sure and scroll down. MELT!!
Recipe: Stephanie Stiavetti and Garrett McCord, Courtesy of Little, Brown and Company Photo: Matt Armendariz, Courtesy of Little, Brown and Company
And in case you want to try some savory dishes, MELT is filled with recipes including: Pumpkin Stuffed with Fontina, Italian Sausage, and Macaroni Raclette with Farfalle, Cornichons, and Sautéed Onions Red Hawk Macaroni with Prosciutto and Raspberry Jam Penne with Garrotxa, Serrano Ham, and Sun-Dried Tomato Beecher’s Flagship Cheddar with Avocado, Lime, and Shell Pasta Gruyere and Emmentaler Macaroni with Ham and Cubed Sourdough Humboldt Fog with Grilled Peaches and Orzo
Chocolate Pasta with Bucherondin, Hazelnuts, and Cherries
Ingredients
Photo: Matt Armendariz
2 to 4
¼ cup plus 2 tablespoons hazelnut oil
2 tablespoons red wine vinegar
2 tablespoons maple syrup
¼ teaspoon mustard powder
1 heaping tablespoon cocoa nibs
Pinch of sea salt
Pinch of freshly ground black pepper
½ cup hazelnuts
12 ounces chocolate pasta (preferably linguine, but use what you can find)
5 ounces Bucherondin, roughly broken apart
1 cup pitted cherries (Bing, Brooks, or Rainier are all lovely varieties)
2 cups whole arugula leaves, washed and dried
You need at least one superbly esoteric recipe in your repertoire, something
easy to put together using one or two chic ingredients that will take your culinary
reputation up a peg and make you a champion in the kitchen. This is that dish.
Bitter chocolate pasta, whole cherries, toasted hazelnuts, and a hazelnut–cocoa
nib vinaigrette conspire to produce a savory treat that will amaze your guests.
All this comes together around a Loire cheese called Bucherondin. Bucherondin
sounds like the name of a French superhero; taste this lovely goat cheese,
and you may very well decide that’s exactly what it is. Smooth and chalky at first,
it sheds its mild-mannered identity and reveals an astonishing tang and spice.
1. Preheat the oven to 350°F.
Place the hazelnut oil, red wine vinegar, maple syrup, ground mustard, cocoa nibs, salt, and pepper in a jar with a tight-fitting lid and shake vigorously to combine. (A bowl and whisk will do this job just fine too.) Taste and adjust seasonings as desired. Set aside.
2. Place the hazelnuts on a baking sheet and toast in the oven for 10 to 15 minutes, or until the skins darken and blister, and the nuts are hauntingly fragrant. Wrap the hazelnuts in a clean dishtowel and leave them to steam for 1 minute. Rub the nuts in the dishtowel to scrub the skins off. Don’t worry if some of the skins stay; you just want the bulk of them removed. Roughly chop the nuts and set aside.
3. While the hazelnuts are roasting, cook the pasta until al dente. Drain through a colander and divide the pasta evenly among four bowls.
4. Scatter the Bucherondin over the top of the pasta, followed by the cherries and hazelnuts. Top each bowl joyfully with a carefree handful of arugula, dress with the vinaigrette, and serve.
Alternative cheeses: Bûcheron, Zingerman’s Lincoln Log, Caña de Cabra
Wine pairings: rosés, California Pinot Noirs
Additional pairings for the cheese: preserved cherries, tea preserves,
fresh figs, mangoes
Today is National Boston Cream Pie Day. A Boston Cream Pie is a round
cake that is split and filled with a custard or cream filling and
frosted with chocolate. Not exactly your standard pie, but it's been
around since 1855 or 1856 (two different sources with different dates).
According to Wikipedia, Boston Cream Pies were created by French Chef M. Sanzian at Boston's Parker House Hotel,
opened in 1855. This pudding/cake combination comprises two layers of
sponge cake filled with vanilla custard or crème pâtissière. The cake was
topped with a chocolate glaze (such as ganache) and sometimes
confectioner's sugar or a cherry. The cherry and sugar topping is rarely used any more.
The
real question is why this is called a pie? It's a cake, after all --
two layers of yellow cake filled with custard and topped with chocolate
frosting. Suggestions on why it's called pie are welcome. And here's an esoteric fact: The Boston cream pie is the official desert of the Commonwealth of Massachusetts.
This Retro Ad (3/29/68) from Jello-O Pudding has a quick and easy recipe for Boston Cream Pie. I really prefer making the cake, filling and ganache from scratch. You know I'm a sucker for good chocolate which for me will make or break the taste of a good Boston Cream Pie. However, if you don't have time, I've posted the Jell-O Pudding Boston Cream Pie recipe below.
I. BOSTON CREAM PIE FROM SCRATCH
Ingredients
1 cup plus 2 tablespoons sifted cake flour
2/3 cup sugar
1-1/2 teaspoons baking powder
1/4 teaspoon salt
1/2 cup milk
1/4 cup cooking oil
2 egg yolks
1 teaspoon vanilla
2 egg whites
1/4 teaspoon cream of tartar
Pastry cream, recipe follows
Ganache, recipe follows
Pastry Cream Filling
2 cups milk
1/2 vanilla bean, split lengthwise, seeds scraped out
6 egg yolks
2/3 cup granulated sugar
1/4 cup cornstarch
1 tablespoon sweet butter
Ganache
8 ounces good quality semisweet chocolate
1 cup heavy cream, boiling
Directions
Cake
Preheat
oven to 350 degrees. In medium mixing bowl combine flour, sugar,
baking powder, and salt. Make well in center of lour mixture.
Add milk, oil, egg yolks, and vanilla. Beat with electric mixer on
low to medium speed until combined. Beat additional 3 minutes on high
speed and set aside.
In large mixing bowl, beat egg whites and
cream of tartar on medium to high speed until soft peaks form. Pour egg yolk mixture over egg white mixture and fold in. Gently pour
batter into 9-inch greased pie pan. Bake for 25 to 30 minutes or
until top springs back when lightly touched. Invert pan onto wire rack. Cool completely.
Pastry Cream Filling
In medium saucepan, heat milk and vanilla bean to boil over
medium heat. Immediately turn off heat and set aside to infuse for
10 to 15 minutes. In bowl, whisk egg yolks and granulated sugar
until light and fluffy. Add cornstarch and whisk vigorously until no
lumps remain. Whisk in 1/4 cup of the hot milk mixture until
incorporated. Whisk in remaining hot milk mixture, reserving
empty saucepan.
Pour mixture through strainer back into saucepan. Cook over medium-high heat, whisking constantly, until
thickened and slowly boiling. Remove from heat and stir in
butter. Let cool slightly. Cover with plastic wrap, lightly pressing plastic against surface to prevent skin from forming. Chill at
least 2 hours or until ready to serve. (Custard can be made up to 24 hours in advance. Refrigerate until 1 hour before using.)
Ganache
In medium bowl, pour boiling cream over chopped chocolate and stir until melted.
To assemble pie
Remove cake from pan. Cut cake in half horizontally. Place
bottom layer on serving plate or board, and spread with pastry
cream. Top with second cake layer. Pour chocolate ganache over and down
sides of cake. Store in refrigerator.
Halloween just screamsCandy Corn! I love it. Candy Corn is pretty much pure sugar, but if you're not going to go all out at Halloween, when are you?
According to the National Confectioners Association, 20 million pounds (9000 tons) of candy corn are sold annually.
I love putting M&Ms and other candy in brownies, so why not candy corn? Love this recipe for White Chocolate Candy Corn Blondies. It's simple and delicious. I possted a recipe last year for candy corn in 'regular' dark chocolate brownies, but I think it goes particularly well in Blondies.
This recipe was sent to me by Davidson's Safest Choice Eggs. Their eggs feature a special pasteurization process that submerges the eggs in large warm water baths. Unfortunately their eggs are not available in my area. The recipe is from Laura of Pies and Plots. If this recipe is too sweet for you, adjust the sugar as needed (or wanted).
White Chocolate Candy Corn Blondies
Ingredients
2 sticks sweet butter
1 cup white chocolate, chopped
3/4 cup granulated sugar
3/4 cup packed light brown sugar
2 tsp pure vanilla extract
4 eggs
2 cup flour
1/2 tsp kosher salt
3/4 cup candy corn
Directions
1. Preheat oven to 350° F. Butter 9x13 baking pan and line with parchment, going up sides of the pan. Do not butter the parchment.
2. In medium microwave-safe bowl, melt butter and white in microwave in 30-second increments, stirring in between to help with melting. Be sure mixture is fully melted. It will separate. That's okay. Set aside to cool for about 5 minutes.
3. In large bowl, mix together sugars, vanilla, and eggs with spoon or spatula. Add melted butter and white chip mixture, mixing until fully incorporated and mixture has lightened in color slightly. Add flour and salt and stir until just combined. Stir in candy corn.
4. Pour batter into prepared pan and bake for 35 minutes, until toothpick inserted in center of Blondies comes out with only a few moist crumbs. Cool completely in pan before cutting into bars and serving.
Today is National Pumpkin Cheesecake Day: Add Chocolate...I love pumpkin and chocolate... and cheesecake is my thing, so here's an easy recipe for a Pumpkin Chocolate Cheesecake! Celebrate.
Great for Halloween and Thanksgiving!
The
filling for this pumpkin cheesecake is adapted from Hershey's Kitchens. I like
this recipe because it includes Mini-Chocolate Chips in the filling! I don't like the original chocolate cookie crust from Hershey's, so I'm posting one of my favorites. Of course you can always just make a chocolate cookie crust with crushed chocolate wafers and a bit of melted butter, but try the one below.
PUMPKIN CHEESECAKE IN CHOCOLATE COOKIE CRUST
Ingredients
1 Chocolate Cookie Crust (see two possible recipes below)
3 packages (8 oz. each) cream cheese, softened
1 cup sugar
3 Tbsp all-purpose flour
1 tsp pumpkin pie spice
1 cup canned pumpkin
4 eggs
1-1/2 cups Mini Semi-Sweet Chocolate Chips
Directions
1. Prepare Chocolate Cookie Crust. Increase oven temperature to 400°F.
2.
Beat cream cheese, sugar, flour and pumpkin pie spice in large bowl
until well blended. Add pumpkin and eggs; beat until well blended. Fold
in mini-chocolate chips; pour batter into prepared crust. Bake 10
minutes.
3. Reduce oven temperature to 250°F; continue baking 60
minutes or until almost set. Remove from oven to wire rack. With knife,
loosen cake from side of pan. Cool completely; remove side of pan.
Refrigerate about 5 hours before serving.
CHOCOLATE COOKIE CRUST
30 chocolate wafers (Nabisco Famous Chocolate Wafers makes about 1-1/2 cups crumbs)
5 Tbsp sweet butter, melted and slightly cooled
1/8 tsp salt
1/2 tsp Madagascar vanilla extract
1. Put cookies in container of food processor; process until finely ground.
2. Transfer crumbs to mixing bowl; combine crumbs, butter, salt, and vanilla; stir until crumbs are moistened.
3.
Press mixture evenly across the bottom of 9-inch springform pan and
all the way up sides of pan; pack tightly so crust is even and
compacted.
4. Bake in 350° oven for 6-8 minutes or until crisp.
5. Let cool completely before filling.
O.K. you know I'm a sucker for PEEPS. They may not be the healthiest of treats for Halloween, but I love that PEEPS are made for different holidays. So many shapes. I was going to make a few dioramas, but when perusing the PEEPS site, I came across this easy recipe and darling PEEPS Chocolate Mousse Dessert Jars. I love dessert in a jar! You can top these Chocolate Mousse Dessert Jars with the PEEPS of your choice, but aren't these Halloween chicks perfect?
PEEPS CHOCOLATE MOUSSE IN A JAR! from PEEPS recipes
Ingredients
One package of PEEPS Chocolate Flavored Mousse Cats PEEPS of your choice for garnish
Two 8 oz containers of whipped topping
One cup milk or semi-sweet chocolate chips
One tablespoon sweet butter
1 cup chocolate cookie crumbs (I like Nabsico Famous Chocolate Wafers)
Four ramekins, cups or jars for serving
Directions In microwave safe bowl (or in a pan over simmering water) combine chocolate chips, butter and two PEEPS Chocolate Flavored Mousse Cats.
Microwave on 50% power for 30 seconds, remove to stir. Continue to microwave in 15 second increments until chocolate ship and PEEPS have melted. Stir to combine. The mixture will be very thick. Allow mixture to cool for five minutes.
In large bowl, combine 8oz container of whipped topping and melted chocolate mix.
Mix with electric mixer on low until well combined. Set aside.
In ramekins, cups or jars, sprinkle 1/4 cup of cookie crumbs on bottom of container.
Gently spoon 1/4 of chocolate mousse mixture into each container, on top of cookie crumbs.
Top with additional whipped topping.
Refrigerate until ready to serve.
Just before serving top each mousse cup with a Marshmallow PEEP of your choice.
This is a unique event with limited tickets available for attendees, the Fall Luxury CHOCOLATE SALON participants include over 30 chocolatiers, confectioners, wineries and other culinary artisans.
Chocolate aficionados, fanatics, lovers and addicts can taste & experience the finest in artisan, gourmet & premium chocolate in one of the world's great culinary regions.
2013 Participants include Amano Artisan Chocolate, The TeaRoom Chocolate Company, CocoTutti, Cocoa Vida, Fera'wyn's Artisan Chocolates, Nuttyness, La Chatelaine Chocolat Co., Amella Caramels, Scharffen Berger Chocolate Maker, Charles Chocolates, Flying Noir, Quail Point Chocolate, Socola Chocolatier, Clarine's Florentines, Jade Chocolates, Plumeria Flours - cookies & confections, Feve artisan chocolatier, Chocolate Stars USA, Coco Delice Fine Chocolates, Neo Cocoa, Taza Chocolate, Farm Fresh To You, Be a Gourmet, The Winery SF, Sol Rouge, Rosa d'Oro Vineyards, Vie Wines, Spicy Vines, Howell Mountain Vineyards, Satori Cellars, Raff Distillerie, Jerk'NPickle, Tipsy Tea, TasteTV, and more.
Salon highlights include chocolate tasting, chef & author talks, wine tasting and ongoing interviews by TasteTV's Chocolate Television program. (Salon Entry includes all chocolate & confection tastings, demos, etc.).
This morning there was the most spectacular Harvest Moon I've seen in years. It was a dark orange and huge! Of course, it's going to be hot today, so I shouldn't be that surprised. However, what really surprised me was that I was able to catch this shot of the moon with my tiny Canon ELPH 310HS. What a surprise. O.K. it's a bit blurry, but still. Looks like pumpkin to me!
So I thought.. what goes with a Harvest Moon? Pumpkin Brownies, of course! So here's a recipe for Pumpkin Brownies adapted fromLibby's Pumpkinthat's great for this time of year -- Halloween and Thanksgiving or as after school treats! I'm calling them Harvest Moon Pumpkin Brownies. My mother's name is Libby, so I usually use Libby Pumpkin in recipes. "Libby, Libby, Libby, on the Label, Label, Label." You can always substitute 'real' pumpkin. FYI: These brownies are more cakelike than chewy. With that in mind, enjoy!
HARVEST MOON PUMPKIN BROWNIES
Ingredients
Nonstick cooking spray
1/2 cup LIBBY'S® 100% Pure Pumpkin
1/3 cup light brown sugar
1 large egg
2 large egg whites
2 Tbsp vegetable oil
1 cup all-purpose flour
1 tsp baking powder
1 tsp DARK unsweetened Cocoa
1/2 tsp ground cinnamon
1/2 tsp ground allspice
1/4 teaspoon salt
1/4 teaspoon ground nutmeg
1/2 cup broken dark chocolate chunks (or chocolate chips)
Directions
1. Preheat Oven to 350° F. Spray 8- or 9-inch-square baking pan with nonstick cooking spray.
2. Combine pumpkin, sugar, egg, egg whites and oil in large mixer bowl.
Beat with electric mixer on medium speed until blended. Add flour,
baking powder, cocoa, cinnamon, allspice, salt and nutmeg.
3. Beat on low speed until batter is smooth. Stir in morsels. Spread evenly into prepared pan.
4. Bake for 25 to 30 minutes or until wooden pick inserted near center
comes out clean. Cool in pan on wire rack. Cut into 2-inch squares.
I just have to share this lovely little film that Dogtoothfilms made about Keeley Burns, an artisan chocolatier who created a chocolate legacy in memory of her beloved Nana Joyce.
This film and Nana's Chocolate Buttons really hit home for me. My own Bubby was a seamstress, and I loved to go through her button box. So many sizes and shapes and stories. My Poppy, my grandfather, was a tailor, and he added to her button box over the years. My other set of grandparents ran a dry goods store, and they had beautiful and plain buttons. Their store in Norristown, PA, contained fabulous fabrics and buttons and trim that they sold to Philadelphia society women, as well as plain cloth to the Amish and Pennsylvania Dutch in the area. I have such fond memories of spending time with both sets of grandparents--and their buttons!
And, that is why I was so taken by this story about Keeley Burns and her Nana's Buttons. After Nana Joyce's death, Keeley and her Grandpa Jack, now 93, found a box of buttons in the wool shop Nana Joyce ran in Manchester, England, during the 1970s.
Keeley's husband David, head chocolatier at their company Audrey's Chocolates in Hove, East Sussex, knew the leftover sewing stock and would make brilliant moulds for chocolate buttons. The big, geometric shapes and retro patterns instantly reminded them of their beloved grandmothers.
Keeley says people's reaction to the buttons has been brilliant: "At first they're not sure who is in the photo on the tag and when I explain it's my Nana, they love it."
Audrey's Chocolates is currently offering a 10% discount to readers with online purchases from their website using the discount code DT1 at the check-out Audrey's Chocolates
Happy National Liqueur Day! I often make Chocolate Liqueur Truffles. They're so easy to make, and you can change the liqueurs whenever you'd like. But last year I started making my own chocolate liqueur. It's simple, and you should try it. Of course you can always buy Chocolate Liqueur, and I'll have to admit that Godiva has an awesome dark chocolate liqueur. You might also want to try Mozart Black Chocolate.
But if you want to make your own, you'll want to try one of the following two recipes for Making Your Own Chocolate Liqueur.
As always, use the best cacao nibs or cocoa, vodka and vanilla. You won't have the results to taste today, but it will be worth the wait!
1. CHOCOLATE LIQUEUR The recipe is from Serious Eats, one of my favorite sites.
Ingredients
2/3 cup cacao nibs
1 1/3 cup vodka
1 1/2 cups sugar
1 cup water
2 teaspoons Madagascar vanilla extract
Directions
Combine cacao nibs and vodka in sealable glass jar. Shake and let steep for 8 days.
After initial steeping period, bring sugar and water to a boil. Let syrup cool, then add to jar along with vanilla extract. Let steep an additional day.
Strain out nibs through sieve and filter through a coffee filter into bottle or jar. Store in this jar.
II. CHOCOLATE LIQUEUR This Recipe from Creative Culinary uses Scharffen Berger Cocoa Powder.
Ingredients
1/4 cup unsweetened good cocoa powder (Scharffen Berger)
1 cup boiling water
1 cup granulated sugar
1 cup water
1 cup vodka
Directions
In bowl, dissolve cocoa powder in boiling water.
In saucepan, bring sugar and water to simmer, stirring until sugar is dissolved.
Add sugar syrup to cocoa syrup.
Strain through fine-mesh sieve into jar with lid. Add vodka, cover and refrigerate for one week.
To serve, stir well and strain again through fine-mesh sieve.
These two recipes should get you started. Try less sugar and maybe add almond extract--or use run instead of vodka. Experiment!
You can drink this straight, use it in truffles or make a martini.
Have a wonderful National Liqueur Day. Make it Chocolate!
Today is a holiday worthy of Halloween. October 14 is National Chocolate-Covered Insects Day.
I've posted several examples of chocolate covered insects before: Chocolate Scorpions and other chocolate covered insects, but here's a recipe from Weird-Food.com for Chocolate Cricket Chip Cookies. They put the crunch into the cookie. O.K. it's weird, but Frank spent 3 years in Cote d'Ivoire, and it doesn't seem weird to him at all. Dry-roasted Crickets add protein and crunch. Luckily, I do all the baking at home. I've seen a different version of these Chocolate Chip Cricket Cookies with whole crickets in them. Too much for me! Declaration: I've never made these, and I never will. I'm definitely not a bug person. But because of the holiday, I thought I'd share the following recipe.
Chocolate Cricket Chip Cookies
Ingredients
2 1/4 cup flour
1 tsp. baking soda
1 tsp. salt
1 cup butter, softened
3/4 cup sugar
3/4 cup brown sugar
1 tsp. vanilla
2 eggs
1 12-ounce chocolate chips
1 cup chopped nuts
1/2 cup dry-roasted crickets
Directions
Preheat oven to 375.
In small bowl, combine flour, baking soda and salt; set aside.
In large bowl, combine butter, sugar, brown sugar and vanilla; beat until creamy.
Beat in eggs.
Gradually add flour mixture and Crickets, mix well.
Fold in chocolate chips.
Drop by rounded measuring teaspoonfuls onto ungreased cookie sheet. Bake for 8-10 minutes.
Photo: Chocolate Chips not Crickets. I just couldn't.
Today is Canadian Thanksgiving, and because I think all holidays should be celebrated with Chocolate, I know you'll love this Double Layer Chocolate Pumpkin Mousse Pie. Perfect for the holiday!Since it's Canadian Thanksgiving, this recipe is from theDairy Farmers of Canada website Dairy Goodness. Hope my North of the Border friends have a wonderful celebration. And, for those in the U.S., this Pie is fabulous for our Thanksgiving in late November.
I first celebrated Canadian Thanksgiving at a Bouchercon (the World Mystery Convention) that was held several years ago in Toronto. I confess, I didn't realize there was 'another' Thanksgiving. For me Thanksgiving was about the Pilgrims, the Rock, the Turkeys. Same foods in Canada, but different date and reasons. So in case you're also unaware, here's some information on the origins of Canadian Thanksgiving which is more closely aligned to the traditions of Europe than of the United States.
The very first Thanksgiving celebration in North America took place in Canada when Martin Frobisher, an explorer from England, arrived in Newfoundland in 1578. He wanted to give thanks for his safe arrival to the New World. That means the first Thanksgiving in Canada was celebrated 43 years before the pilgrims landed in Plymouth, Massachusetts! For a few hundred years, Thanksgiving was celebrated in either late October or early November, before it was declared a Canadian National Holiday in 1879. It was then, that November 6th was set aside as the official Thanksgiving holiday. On January 31, 1957, Canadian Parliament announced that the second Monday in October would be Thanksgiving -- "a day of general thanksgiving to almighty God for the bountiful harvest with which Canada has been blessed."
Another reason for Canadian Thanksgiving taking place earlier than its U.S. counterpart is that Canada is geographically further north than the United States, causing the Canadian harvest season to arrive earlier than the American harvest season. But what are the differences between Canadian and American Thanksgiving, other than the date? Not much! Both Canadians and Americans celebrate Thanksgiving with parades, family gatherings, pumpkin pie and a whole lot of turkey! (Info from Kidzworld.com)
So here's a fabulous Double Layer Chocolate Pumpkin Pie for the Thanksgiving table.
Double Layer Chocolate Pumpkin Mousse Pie
Ingredients
Crust:
1-1/2 cups chocolate cookie crumbs (chocolate wafers that have been crushed)
1/4 cup sweet butter, melted
Chocolate Ganache Layer:
8 oz bittersweet chocolate, chopped
2 tbsp sweet butter, softened
1 cup 35% whipping cream
Pumpkin Layer:
8 oz cream cheese, softened
1/2 cup packed light brown sugar
1 cup pumpkin puree
2 tsp Madagascar vanilla extract
1 tsp ground cinnamon
1/2 tsp ground ginger
1/4 tsp cloves
1 cup thick whipping cream
Whipped cream, to garnish
Freshly grated nutmeg
Directions
Crust:
In bowl, combine cookie crumbs and butter until moistened and pat evenly into bottom and up side of 10-inch deep pie plate. Bake in preheated 350 °F oven for about 10 minutes or until firm. Let cool.
Chocolate Ganache Layer:
Place chocolate and butter in bowl. In small saucepan bring cream to boil. Pour over chocolate and let stand for 1 minute. Slowly whisk chocolate until melted and smooth. Gently pour into cooled crust. Place in refrigerator for about 1 hour or until set.
Pumpkin Layer:
Meanwhile, in large bowl, beat Cream Cheese and Sugar until fluffy. Beat in pumpkin, vanilla extract, cinnamon, ginger and cloves until smooth.
Whip cream. Fold half of cream into pumpkin mixture until light. Fold in remaining whipped cream until well combined. Spread over top of chocolate layer and smooth top. Refrigerate for about 2 hours or until set and firm. (If you make ahead: you can cover and refrigerate for up to 2 days.)
Garnish with whipped cream and nutmeg before serving.
In the U.S., we celebrate Columbus Day.. although some cities (mine) and states people call it Indigenous People Day. In terms of chocolate, though, Christopher Columbus was the first European to come in contact with cacao. On August 15, 1502, on his fourth and last voyage to the Americas, Columbus and his crew encountered a large dugout canoe near an island off the coast of what is now Honduras. The canoe was the largest native vessel the Spaniards had seen. It was "as long as a galley," and was filled with local goods for trade -- including cacao beans. Columbus's crew seized the vessel and its goods, and retained its captain as his guide.
Later, Columbus' son Ferdinand wrote about the encounter. He was struck by how much value the Native Americans placed on cacao beans, saying:
"They seemed to hold these almonds [referring to the cacao beans] at a great price; for when they were brought on board ship together with their goods, I observed that when any of these almonds fell, they all stooped to pick them up, as if an eye had fallen."
At first, however, the cocoa beans were neglected. Despite the bitterness of the drink produced, Columbus claimed the
resulting concoction was a "divine drink which builds up resistance and
fights fatigue. A cup of this precious drink permits a man to walk for a
whole day without food".
What Ferdinand and the other members of Columbus' crew didn't know at the time was that cocoa beans were the local currency. In fact, in some parts of Central America, cacao beans were used as currency as recently as the last century.
While it is likely that Columbus brought the cacao beans he seized back to Europe, their potential value was initially overlooked by the Spanish King and his court.
Far more exciting treasures on board his galleons meant the cocoa beans were ignored.
It was his fellow explorer, the Spanish Conquistador Don Hernán Cortés, who first realized their commercial value. He brought back three chests full of cocoa beans to Spain in 1528 and very gradually, the custom of drinking the chocolate spread across Europe.
It was still served as a beverage when the Spanish first brought chocolate back to Europe. Cortez, described chocolatl as "the divine drink ... which builds
up resistance and fights fatigue," and his countrymen, conceived the idea
of sweetening the bitter drink with cane sugar.
The recipe for the sweetened
frothy beverage underwent several more changes in Spain, where newly discovered
spices such as cinnamon and vanilla were added as flavorings. The original chili pepper that made the spicy drink was replaced by sugar to make a sweet beverage. The sweetened chocolate beverage was a luxury that only a few could afford.
By the 17th century, the drink became common among European nobility. In London, chocolate was more widely available, and those who could afford it could enjoy the drink in coffee and chocolate houses.
Super Rich Spanish Hot Chocolate
Makes two mugs!
Ingredients
5 tbsp good quality unsweetened DARK cocoa powder
4 Tbsp sugar
1/2 Tbsp corn starch
1 tsp Mexican vanilla extract
1 cup water
Directions
Combine cocoa powder, sugar and corn starch in small bowl.
Pour COLD water into small sauce pan, add vanilla extract and cocoa mixture and cook at medium low heat, stirring constantly.
Cook until it thickens and serve immediately.
Devil's Food Cake is one of the most popular chocolate cakes in the United States. Because of that I've posted many Recipes and Retro Ads, but here are a few more for Devil's Food Cake!
Hope you enjoy this Round-up of Retro Devil's Food Cake ads. Have a big piece of Devil's Food Cake to celebrate! And, in case you're really an Angel.. you can make Chocolate Angel Food's Cake.
Baker's Chocolate Ad 1940s
The Baker's Ads are earlier and everything is from scratch, but as you know from reading this blog, boxed mixes came in as a space saving measure after World War II, so I have several ads for Betty Crocker and Duncan Hines.
Today is National Angel Food Cake Day. Well, just in case you were worried that there would be no chocolate, I have to post my go-to recipe for Chocolate Angel Food Cake. Recipe from Martha Stewart! This cake is light and airy and delicious... truly angelic!
Angel food cake is a cake made with a lot of egg whites and usually no shortening or leavening agent. It's like a sponge cake. From WhatsCookingAmerica.net comes this piece of information: Angel Food Cake is also known as ice cream cake (a Pennsylvania Dutch wedding cake). And, because there are an abundance of cake molds in southeastern PA, one of the major producer of cake molds, angel food cake may have originated there in the 1800s. Some other historians think that the first angel food cakes were baked by African slaves in the South because making this cake required a strong beating arm and lots of labor to whip the air into the whites (pre egg-beaters 1865). Angel Food cakes are also a traditional African-American favorite at funerals. You decide, but whatever the origin, you'll love this cake!
CHOCOLATE ANGEL FOOD CAKE
Ingredients
1 1/2 cups sugar
Scant 1 cup cake flour (not self-rising)
1/4 cup cocoa powder
1 tsp baking soda
1/2 tsp salt
1 ounce dark chocolate, grated (about 1/2 cup)
12 large egg whites
1 tsp cream of tartar
1 tsp pure Madagascar vanilla extract
1/4 tsp pure almond extract
Directions
Preheat oven to 350 degrees. Place oven rack in center.
Sift together onto a piece of parchment paper 3/4 cup sugar, flour, cocoa powder, baking soda, and salt. Add grated chocolate; set aside.
In bowl of electric mixer fitted with whisk attachment, beat egg whites and cream of tartar until soft peaks form. With machine running, add remaining 3/4 cup sugar in slow steady stream, beating until fully incorporated and stiff glossy peaks form. Add vanilla and almond extracts; beat to combine.
Remove from mixer. Gradually add flour mixture, gently but thoroughly, folding into egg-white mixture until fully combined. Pour into nonstick angel food cake pan. Tap pan on counter to remove air bubbles. Bake until cake springs back when depressed with finger, 30 to 35 minutes.
Cool, inverted, 1 hour before removing pan.
October 9 is Moldy Cheese Day. Don't you just love the name, Moldy Cheese Day? Perfect for October! For me, Moldy Cheese means Blue Cheese. O.k. I know there are a lot of moldy cheeses out there, but give me a good Stilton or Gorgonzola any day. So in honor of Moldy Cheese Day, I'm making Blue Cheese Truffles. Simple and delicious.
Scroll down for an easy recipe for Blue Cheese Truffles (I'd call them Moldy Cheese Truffles, but I fear no one will eat them).
No time or inclination to make your own? There are several Chocolate companies that offer fabulous Smokey Blue Cheese Truffles. I really like Lillie Belle Farmsin Southern Oregon. I've tasted them at the San Francisco International Chocolate Salon, and they're delicious. Organic milk chocolate, Rogue Creamery's smoked blue cheese and toasted almonds. It's an awesome combination.
My other favorite truffles are Bissinger's Chocolate-Covered Point Reyes Original Blue Cheese Wine Grape. They're a great combination of sweet and savory. I'm a sucker for chocolate and cheese, and local Point Reyes Original Blue is one of my favorite blues. Add a wine grape to that, and I'm in heaven. I sampled these at the Fancy Food Show last year, but I haven't seen them recently in the markets. Let me know if you find them. They're fab!
But, of course, you can make your own Blue Cheese (Moldy Cheese) Truffles! This recipe is adapted from Harold McGee's Cookbook On Food and Cooking. Remember that the taste will change depending on the chocolate and cheese you choose!
BLUE CHEESE TRUFFLES
FILLING
2 ounces Blue Cheese, room temperature
1 tablespoon superfine sugar
2 ounces Dark chocolate (70% cacao), finely chopped
COATING
6 ounces dark chocolate (70% cacao), finely chopped
Make sure the cheese is at room temperature.
In mixing bowl, combine cheese and sugar and mix until sugar dissolves.
Melt filling chocolate in top of a double boiler (or saucepan over saucepan) over simmering water.
Use 2 ounces for blue cheese fillings. Make sure cheese is at room temperature and very soft. If it is too firm, microwave very briefly to soften.
Combine melted chocolate, superfine sugar, and cheese and work together with a wooden spoon or flexible spatula until the mixture is homogeneous. (This may be easier if you add a few drops of water or a little butter.) If mixture is too soft to shape, refrigerate 15 to 20 minutes.
Roll portions of mixture into 1/2-inch balls and refrigerate 15 to 20 minutes.
Melt and temper coating chocolate. Dip cheese balls in tempered chocolate, letting excess drain off. Allow to set at room temperature. Keep in cool place and serve on same day.
Note: Cheese will resume fermentation if left at room temperature, so this is one case where truffles should be refrigerated if kept for more than a day. Place on a sheet or tray and wrap snugly in waxed paper, then plastic wrap, before refrigerating. Allow to warm to room temperature before unwrapping.
Explore your adventurous side for a chance to win $25,000.Scharffen Berger® chocolate and TuttiFoodie.com invite you to enter the seventh annual Chocolate Adventure Contest.
Create an original recipe for any kind of bar—from brownies and blondies and seven layer bars to cookie-based bars, ice cream bars, chocolate bark—even handcrafted candy bars.
The Challenge: Combine Scharffen Berger chocolate with one or more of 12 “adventure ingredients” in your recipe to Create a Bar!!! Entries accepted from October 1, 2013 through January 2, 2014.
The Adventure Ingredients: Bourbon Turbinado Sugar Fresh Pomegranate Hibiscus Extra Virgin Olive Oil Peppercorns (Any Type—Black, Red, Green) Pandan Leaf or Pandan Leaf Extract Coconut Milk, Cream, Butter or Oil Oat Flour Carrot Sesame Seeds (Black or White) Fresh Croutons or Crostini
Entries will be judged based on creativity, taste, ease of preparation and whether the recipe reflects a spirit of adventure.
Judging panel includes some of the country’s foremost baking and chocolate experts: John Scharffenberger; Alice Medrich, award-winning cookbook author and chocolate expert; Matt Armendariz, food photographer and owner of MattBites blog; and Angie Dudley, owner of Bakerella blog and creator and author of Cake Pops.
Today is National Noodle Day, and it's also National Pasta Month. Noodles are pasta, but for some reason I always think of noodles as flat wide pasta. So celebrate both holidays today with Lokshen (Egg Noodle) Kugel. This is a great recipe for Noodle Kugel with Chocolate Chips. It's a sweet Kugel anyway, so why not add chocolate chips?
A bit of history on Kugel. Kugel is a traditional Ashkenazic Jewish dessert or side dish. Kugel is Yiddish for ball, but it is sometimes translated as pudding or casserole, and related to the German Gugelhupf. The first Kugel were plain -- made from bread and flour, and salty rather than sweet. About 800 years ago, their flavor and popularity changed when cooks in Germany replaced bread mixtures with noodles or farfel. Eventually eggs were incorporated. The addition of cottage cheese and milk created a custard-like consistency which is common for today's dishes. In the 17th century, sugar was introduced, which gave the option of serving kugel as a side dish or dessert. In Poland, Jewish women sprinkled raisins and cinnamon into recipes. Hungarians took the dessert concept further with a hefty helping of sugar and some sour cream.
I like Kugel with sour cream, cottage cheese and sugar--and chocolate chips. Many people add corn flakes, graham cracker crumbs, ground gingersnaps or caramelized sugar on top. Some people layer the dish with sliced pineapples or apricot jam. Traditionally, raisins, both dark and golden are added. Kugel is such a versatile dish. Happy Noodle Day! Enjoy this today or any time! It's such an easy dessert....and so fabulous!
Chocolate Chip Noodle Kugel
Ingredients:
12 oz pkg medium wide noodles boiled & drained
4 Tbsp butter, melted
8 eggs
3/4 cup sugar
1 pint (16 oz) cottage cheese (large curd)
2 cups sour cream
1 tsp Madagascar vanilla
3/4 cup DARK chocolate chips
Directions:
Preheat oven to 350.
Butter sides and bottom of 9 x 13 Pyrex or another Pan.
Beat together eggs and sugar. Add cottage cheese, sour cream, melted butter and vanilla and mix with wooden spoon.
Fold in noodles and chocolate chips.
Pour mixture into buttered pan.
Bake at 350°F for 40-60 minutes until just set.
Since there's always chocolate at my house, I have no excuse for not baking a chocolate cake.. but suppose I don't really want to make an
entire cake. Suppose it's just me? 5 Minute Cake in a Mug to the Rescue. I've
posted other recipes for the 5 Minute Cake in a Mug, but this recipe
from Taza, my favorite daily chocolate, is exceptional. Well, Taza Chocolate is exceptional! I have made this with the Taza Chocolate Mexicano (70%
dark), but for variety, you could use the Taza Chiptole Chocolate or the
Taza Orange Mexicano disc. Whichever you choose, you'll end up with the
perfect single serving cake!
Taza 5 Minute Chocolate Cake in a Mug Serves 1
Active time 3 minutes
Total time 3 minutes
Ingredients 2 tablespoons sweet butter
1 disc Taza Chocolate Mexicano, broken into several pieces
1 tablespoon sugar
1 large egg
1 tablespoon unsweetened Dark cocoa powder
pinch of salt
2 tablespoons all-purpose flour
1/4 teaspoon baking powder
Directions
In large mug place butter and chocolate and microwave for 45
seconds.
In separate bowl whisk together sugar, egg, cocoa, salt,
flour, and baking powder until smooth, then add to mug and whisk until
fully incorporated.
Microwave on high for 1 minute, allow to cool for a
few seconds, and eat!
Today is National Vodka Day. There are some wonderful Chocolate Vodkas out there. You can always make yourself a Chocolate Vodka Martini or a Chocolate Vodka Cake, but I'm a huge fan of Truffles. I've posted this recipe before, but it's worth another post! You'll love these truffles.
This is an easy recipe for Black Russian Truffles. A Black Russian
is a cocktail made with vodka and coffee liqueur (three parts vodka to
two parts coffee liqueur, or five parts vodka to two parts coffee
liqueur). I love Kahlua, so that would be my coffee liqueur of choice in the following recipe.
BLACK RUSSIAN TRUFFLES
8 ounces DARK (70-85% cacao) chocolate, chopped
1/4 cup whipping cream
2 tablespoons sweet butter
3 1/2 tablespoons Kahlua
1 1/2 tablespoons Vodka
1 1/2 cups DARK cocoa (or espresso powder or toasted walnuts)
Directions:
Melt chocolate in double boiler or in saucepan on top of another saucepan of simmering water.
Heat cream and butter together in microwave or in pot (don't scorch).
Remove from heat and pour over melted chocolate. Using rubber spatula,
stir chocolate and cream/butter mixture gently until smooth.
Add Kahlua and vodka. Stir until blended.
Cover with plastic wrap and refrigerate 2 hours to overnight.
Shape chocolate into 1-inch balls using melon baller or small ice cream scoop or two spoons.
Roll in cocoa (or pulverized espresso beans or toasted walnuts)
Store in airtight container in refrigerator.
Serve at room temperature.
October is Apple Month! Although many people like caramel covered apples this month, especially for Halloween, I'm more of a chocolate covered Apple sort of person! What could be better? Tart apples enrobed in a covering of sweet dark chocolate, and maybe an extra coating of crunchy chopped nuts. Oh yes!
So here for the October Apple Month celebration is a recipe for Chocolate Covered Apples. Enjoy!
Chocolate Covered Apples
Ingredients
6 firm Gravenstein Apples (or medium sized Fuji or Granny Smith)
6 sturdy lollipop/popsicle sticks
10 ounces Dark chocolate, chopped
1/2 cup nuts, chopped coursely (optional.. but great for additional crunch and texture)*
Waxed paper
Directions
Twist off stems of apples, and insert sticks into apple cores.
Place apples in refrigerator while preparing chocolate.
Melt chocolate in double boiler or saucepan over saucepan (I use a metal bowl over simmering water for this recipe, so it's easy to dip and roll the apple in the same bowl)
Dip apple into melted chocolate, allowing excess to drip back into bowl. Roll around in chocolate, turning with stick, until tentire apple (or 3/4 way up) is coated. Optional: Put Nuts into separate bowl and roll apple until completely covered in nuts.
Place chocolate/nut coated apples on cookie sheet lined with wax paper, standing upright.
Refrigerate 25 minutes or until chocolate is set.
Today is National Homemade Cookies Day! What a great way to start October. So here's a Vintage Ad & Recipe from Baker's Chocolate for Chocolate Cake-Cookies from 1941.There are three variations on these 'Cake-Cookies," too... so try them all!
Mother calls them "easy to make".. father calls them "easy to take"...and the youngsters call them "super duper"..


 Today is National Oatmeal Day, and I can't think of a better way to celebrate than with Oatmeal Chocolate Chunk Cookies! Make sure you use the very best ingredients for the best results. For these cookies, I've used great chocolate from Amano, Guittard, Taza, and Alter Eco, but you can use what you have or like! Just break the bars up into small chunks. Of course, you can always use chocolate chips!
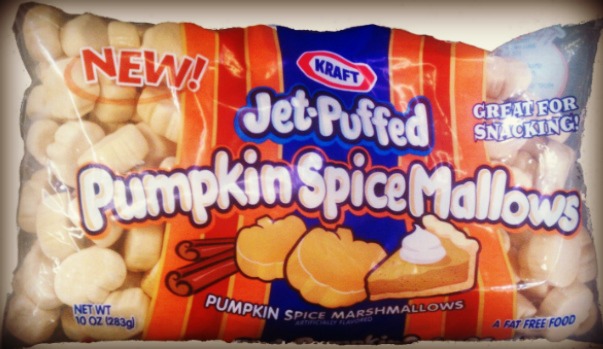


 In microwave safe bowl (or in a pan over simmering water) combine chocolate chips, butter and two PEEPS Chocolate Flavored Mousse Cats.


 2 tablespoons sweet butter
 October is Apple Month! Although many people like caramel covered apples this month, especially for Halloween, I'm more of a chocolate covered Apple sort of person! What could be better? Tart apples enrobed in a covering of sweet dark chocolate, and maybe an extra coating of crunchy chopped nuts. Oh yes!

