
Wednesday, December 31, 2014
New Year's Eve Chocolates: Retro Ad
My idea of a great way to spend New Year's Eve. Chocolates and a good book! Whitman's Sampler Ad from 1936. Love her lounge outfit and silver silver slippers! Happy 2015!
Tuesday, December 30, 2014
Champagne Truffles to Ring in the New Year

Recchiuti Chocolate Champagne Truffles
A version of a classic favorite. Dark chocolate truffle with Schramsberg Blanc de Noirs from Napa Valley and confectioner's sugar.
Seattle Chocolate Company Champagne Truffles. A bubbly truffle featuring a blended milk and dark chocolate center with natural popping candy and a bit of bite. Enrobed in dark chocolate.
Choclatique Bubbly Champagne Truffles. I love these. Have tried them several times. They're light and cream and bubbly!
Moonstruck Champagne Truffle. I love Moonstruck truffles, and these are quite unique. Ivory chocolate ganache, infused with a champagne reduction and enrobed in dark chocolate, then hand-dipped in ivory chocolate.
Coco Delice Sonoma Brut Truffles. Dark chocolate ganache infused with Gloria Ferrar Sonoma Brut. Coated in a layer of dark chocolate and dusted with cocoa powder and confectioners sugar.
Teuscher Chocolate of Switzerland
 House specialty, the famous Champagne Truffle, a blend of cream, butter and chocolate: champagne cream center surrounded by a dark chocolate ganache, covered in milk chocolate and dusted with confectioner’s sugar. Originally created by Adolf Teuscher, Sr. in 1947. Available also in an all dark version which I like even more!
Jacques Torres
Jacques' Taittinger Champagne Truffles are a combination of milk chocolate, fresh cream and Taittinger Brut La Francaise. I love the cork shape of these truffles.
Williams-Sonoma
 La Maison du Chocolat selects and roasts its own cacao beans, and all of the chocolate is made from special house blends. Their collection of chocolate truffles are hand made at the La Maison du Chocolat workshop in Paris. Other truffles but includes Champagne truffles: dark chocolate truffles infused with Fine Champagne Cognac, covered with dark chocolate and dusted with cocoa powder.
Payard Truffles
Champagne Truffles
Neuhaus Champagne Truffles
Dark chocolate dusted with a frosting of powdered sugar with soft centers of champagne butter. Not for the superstitious. Neuhaus Champagne Truffles are sold in boxes of 13.
Godiva makes a champagne truffle, but I haven't had one in awhile. I remember it was beautiful and very smooth, but there was more chocolate taste than champagne. Still Godiva truffles are great.
Charbonnel & Walker Milk Chocolate Marc de Champagne Truffles. Milk Chocolate with Marc de Champagne center. Also try Charbonnel & Walker Chocolate Pink Champagne Truffles. Tangy & Sweet with a strawberry dusting and Marc de Champagne truffle center. Tangy & sweet.
Paul A. Young Champagne Truffles. Made with real Champagne.
Demarquette Champagne Truffles. These are made with vintage Dom Perignon Champagne. U.K. Brut Champagne (Dom Perignon) blended with our very own recipe of single estate and single origin cocoas from around the world and Cornish and Hampshire creams for the ultimate in pure taste. Each truffle is hand dipped in 71.1% couverture chocolate before being dusted with pure cocoa powder.
The-Chocolate Champagne Truffles. Toscano Black, Amedei and Armand de Brignac. Edible pure 24 carat gold and presented in a Swarovski adorned box. "The most luxurious chocolate experience in the world." Available at Harrod's. If you have to ask the price...well...
Vosges Krug Champagne Truffles. Watch this awesome video on making Champagne Truffles.
Making of Krug® Champagne Truffles from Vosges Haut-Chocolat® on Vimeo.
Monday, December 29, 2014
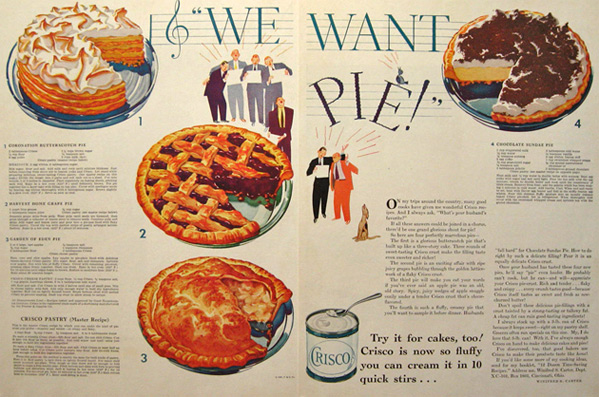
Chocolate Angel Pie: Retro Ad & Recipe

Yesterday I posted all about Crisco Pie Crusts. Be sure and check it out. The recipe below calls for a Crisco Pie Crust. Of course, you can always substitute your own butter crust.
CHOCOLATE ANGEL PIE
Ingredients
Single crust Classic Crisco Pie Crust
1/2 cup Crisco® Butter Shortening OR 1/2 stick Crisco® Butter Flavor All-Vegetable Shortening Sticks
1/2 cup sugar
4 large eggs, lightly beaten
2 cups (12 oz. pkg.) semi-sweet chocolate chips, melted
2 tsp instant espresso powder
1 1/2 tsp vanilla extract
1/2 cup Pillsbury BEST® All Purpose Flour
1 cup coarsely chopped hazelnuts OR 1 cup chopped pecans
Directions
PREPARE single pie crust according to recipe directions, using a 9-inch pie plate; do not bake.
HEAT oven to 350ºF. Beat shortening and sugar in medium bowl at medium speed until light and fluffy.
BLEND in eggs, one at a time. With a wooden spoon, stir in melted chocolate, espresso powder and vanilla until smooth. Add flour and nuts; stir until combined. Pour filling mixture into unbaked pie crust
BAKE 25 minutes. Cool pie completely on cooling rack; refrigerate at least two hours before serving.
Sunday, December 28, 2014
The Perfect Pie Crust and the History of Crisco

The Crisco website has instructions for all kinds of great flaky pie crusts. Depending on the type of pie you're making, you'll want to have the best type of pie crust. Be sure and scroll down for information on the Perfect Pie Crust!
What is Crisco?
Since its introduction in 1911, Crisco® has revolutionized the way food is prepared and the way it tastes. From being the first shortening product made entirely of vegetable oil to creating the first cooking oil that was promoted for its light taste, Crisco has been making life in the kitchen more delicious for years.
Crisco brings to mind homemade, down-home, and traditional meals. It is recognized, comfortable, and trusted across generations, yet it is simple and unadorned. It brings about a certain pride in meal creation and attainable excellence in cooking.
More recent innovations include Canola, Corn, and Natural Blend oils; Crisco Sticks for baking ease; and alcohol-free No-Stick Cooking Sprays. We're proud of our past and look forward to remaining a key ingredient in kitchens everywhere.
Crisco brings variety: from baking to grilling; from American to Asian; from simple salads to a complete home-cooked dinner; from scratch baking to a convenient shortcut. Crisco is also a versatile ingredient that adapts to your cooking style.
Crisco Pie Crusts
SINGLE CRUST
1 1/3 cups Pillsbury BEST® All Purpose Flour
1/2 teaspoon salt
1/2 stick well-chilled Crisco® Baking Sticks All-Vegetable Shortening
OR 1/2 cup well-chilled Crisco® All-Vegetable Shortening
3 to 6 tablespoons ice cold water
DOUBLE CRUST
2 cups Pillsbury BEST® All Purpose Flour
1 teaspoon salt
3/4 stick well-chilled Crisco® Baking Sticks All-Vegetable Shortening
OR 3/4 cup well-chilled Crisco® All-Vegetable Shortening
4 to 8 tablespoons ice cold water
DEEP DISH DOUBLE CRUST
2 2/3 cups Pillsbury BEST® All Purpose Flour
1 teaspoon salt
1 stick well-chilled Crisco® Baking Sticks All-Vegetable Shortening
OR 1 cup well-chilled Crisco® All-Vegetable Shortening
6 to 10 tablespoons ice cold water
PREPARATION DIRECTIONS:
1. BLEND flour and salt in medium mixing bowl.
2. CUT chilled shortening into 1/2-inch cubes. Cut in chilled shortening cubes into flour mixture, using a pastry blender, in an up and down chopping motion, until mixture resembles coarse crumbs with some small pea-sized pieces remaining.
3. SPRINKLE half the maximum recommended amount of ice cold water over the flour mixture. Using a fork, stir and draw flour from bottom of bowl to the top, distributing moisture evenly into flour. Press chunks down to bottom of bowl with fork. Add more water by the tablespoon, until dough is moist enough to hold together when pressed together.
4. TIP Test dough for proper moistness by squeezing a marble-sized ball of dough in your hand. If it holds together firmly, do not add any additional water. If the dough crumbles, add more water by the tablespoonful, until dough is moist enough to form a smooth ball when pressed together.
5. SHAPE dough into a ball for single pie crust. Divide dough in two for double crust or double deep dish crust, one ball slightly larger than the other. Flatten ball(s) into 1/2-inch thick round disk(s).
6. TIP For ease in rolling, wrap dough in plastic wrap. Chill for 30 minutes or up to 2 days.
7. ROLL dough (larger ball of dough for double crust pie) from center outward with steady pressure on a lightly floured work surface (or between two sheets of wax or parchment paper) into a circle 2-inches wider than pie plate for the bottom crust. Transfer dough to pie plate by loosely rolling around rolling pin. Center the rolling pin over the pie plate, and then unroll, easing dough into pie plate.
8. For a SINGLE pie crust, trim edges of dough leaving a 3/4-inch overhang. Fold edge under. Flute dough as desired. Bake according to specific recipe directions.
9. For a DOUBLE pie crust, roll larger disk for bottom crust, trimming edges of dough even with outer edge of pie plate. Fill unbaked pie crust according to recipe directions. Roll out smaller dough disk. Transfer dough carefully onto filled pie. Trim edges of dough leaving a 3/4-inch overhang. Fold top edge under bottom crust. Press edges together to seal and flute as desired. Cut slits in top crust or prick with fork to vent steam. Bake according to specific recipe directions.
10. Two Methods for Pre-baking Pie Crusts (Cream Pies)
11. Pre-baking without weights: Thoroughly prick bottom and sides of unbaked pie dough with fork (50 times) to prevent it from blistering or rising. Bake crust in lower third of oven, at 425°F, 10-12 minutes or until edges and bottom are golden brown.
12. Pre-baking with weights: Thoroughly prick bottom and sides of unbaked pie dough with fork (50 times) to prevent it from blistering or rising. Chill or freeze for 30 minutes. Line pie dough snugly with foil or parchment paper. Fill with dried beans or pie weights. Bake at 375°F for 20 minutes. Remove foil and weights. Reduce oven to 350°F. Bake 5-10 minutes or until edges and bottom are golden brown.
Saturday, December 27, 2014

Friday, December 26, 2014
Candy Cane Day: Chocolate Candy Cane Recipe Round-Up

History of the Candy Cane:
During the 17th century, Europeans adopted Christmas trees as part of Christmas celebrations, and they often made cookies and sugar stick candy as decorations. The first historical reference to the familiar cane shape goes back to 1670, when the choirmaster at the Cologne Cathedral in Germany, bent the sugar sticks into canes to represent a shepherd's staff. The all white candy canes were given out to children during the nativity services. This tradition of handing out candy canes during Christmas services spread throughout Europe and later to America.
The first historical reference to the candy cane in America goes back to 1847, when German immigrant August Imgard decorated the Christmas tree in his Wooster, Ohio home with candy canes.
About fifty years later the first red-and-white striped candy canes appeared. No one knows who exactly invented the stripes, but Christmas cards prior to the year 1900 showed only all white candy canes. Christmas cards after 1900 showed illustrations of striped candy canes. Around the same time, candy-makers added peppermint and wintergreen flavors to their candy canes and those flavors then became the traditional favorites.
1. Hot Chocolate with Candy Canes! Use the candy cane as a stirrer. It will eventually melt and flavor your hot chocolate, coffee, or tea. Of course, a chocolate dipped candy cane is even better!
2. Candy Cane Chocolate Marshmallows. Dip marshmallows in melted dark chocolate and roll in crushed Candy Canes.
3. Candy Cane Truffles.
4. Candy Cane Fudge.
5. Chocolate Candy Cane Cookies
6. Chocolate Candy Cane Bark
7. Chocolate Covered Candy Canes
8. Chocolate Candy Cane Cheesecake
9. Chocolate Candy Cane Trifle

Wednesday, December 24, 2014
Eggnog Brownies and Eggnog Hot Chocolate

Or you can make Eggnog Brownies. These are absolutely delicious! If you already have brandy in your eggnog, you don't need to add more...
Merry Christmas!
Eggnog Brownies
2 eggs
1 Tbsp brandy
1 tsp vanilla
1/2 cup butter
4 ounces unsweetened chocolate
1 cup sugar
1 1/3 cup packed brown sugar
1 1/4 cup all-purpose flour
1 cup chopped pecans
Directions
Grease shallow 11 x7 inch baking pan with butter, line bottom with parchment or waxed paper.
Preheat oven to 350 degrees. Lightly beat eggs with brandy and vanilla; set aside.
Put butter and chocolate in a large saucepan, stir continuously over medium heat until melted.
Remove from heat.
Stir in sugars, flour, pecans, and egg mixture.
Pour into pan. Spread evenly.
Bake 30 minutes or until wooden pick inserted in middle comes out clean.
Allow brownies to cool. Cut into 24 squares.
Remove from pan. Store in airtight container.
Chocolate Guinness Truffles for Christmas

CHOCOLATE GUINNESS TRUFFLES
Ingredients
3/4 cup Guinness
1 pound dark chocolate (65-75% cacao), chopped
3/4 cup heavy whipping cream
Cocoa
Directions
Melt chocolate in top of double boiler or saucepan over another saucepan with simmering water.
Gradually stir in cream.
Gradually add Guinness, stirring gently to blend.
Cover and chill overnight.
Shape mixture into 3/4 inch balls, using about tablespoon for each.
Roll in cocoa (or roll in red and green decorating sugar for Christmas)

Happy Holidays!
Tuesday, December 23, 2014
Holiday Chocolate Barks for Santa or Friends

So here are recipes for a variety of Holiday Barks!
One of the traditional tastes of Christmas is Peppermint! I love Peppermint Bark, and I wish it were available all year, but you can always make your own. Following are three recipes for Peppermint Bark. Do you prefer white, dark, or milk chocolate? Peppermint Bark is easy to make and great to give. As always, use the very best chocolate, and in the case of this first recipe, be sure and use 'real' white chocolate.
1. White Chocolate Peppermint Bark
Ingredients
1 pound white chocolate
candy canes, crushed to make 1/2 cup
Directions
Heat white chocolate in double boiler over low heat until melted.
Add crushed candy cane to white chocolate. Make sure white chocolate stays warm.
Pour mixture onto wax paper-lined cookie sheet, spreading very thinly with spatula.
Place cookie sheet in freezer until mixture has hardened.
Take out of freezer and crack bark into small pieces.
Remove from wax paper and store at room temperature.
2. Microwave White Chocolate Peppermint Bark
Ingredients
1 pound white chocolate
1/2 cup crushed candy canes
Directions
Place chocolate in microwave-safe dish. Microwave on 50% power, stirring often, until chocolate is melted and of creamy consistency.
Stir in crushed candy canes.
Spread on cookie sheet and place in the freezer until set (about 20 minutes).
Break into pieces.
3. Dark Chocolate Peppermint Bark
Ingredients
12 ounces high quality dark chocolate
1/2 cup crushed candy canes
1/2 tsp peppermint extract
Directions
Melt chocolate in top of double boiler (or saucepan on top of saucepan of simmering water).
Remove from heat, add peppermint extract and stir.
Pour melted chocolate onto cookie sheet lined with wax paper and spread out with spatula or wooden spoon.
Sprinkle peppermint candy chunks on chocolate and gently press in with hands.
Put in freezer until hardened (5 minutes).
Break into pieces. Store in fridge in an airtight container.
And, here are two recipes for festive holiday barks that feature red --and red and green--in the bark.
4. Dark Chocolate Pomegranate Ginger Bark

6 ounces dark chocolate (65-70% cacao), chopped
2 Tbsp crystallized ginger
1 cup pomegranate seeds
1 tsp sea salt
Directions
Melt chocolate in top of double boiler or saucepan over saucepan of simmering water.
Remove saucepan with melted chocolate from stove and stir in crystallized ginger and half of pomegranate seeds.
Line baking sheet with parchment. Pour melted chocolate mixture onto sheet. Using a spatula smooth chocolate into even layer about 1/4 inch thick.
Sprinkle with remaining pomegranate seeds and sea salt.
Chill 20-30 minutes (until firm).
Break into pieces and store in airtight container, separating layers with waxed paper.
Serve same day, if possible.
The following recipe is from the King Arthur Flour website. I love the innovative recipes on the website and blog, and, of course, King Arthur Flour's great products! This recipe is very festive with red cranberries and crunchy pecans...and it uses both white and dark chocolate layers. Let's face it, you can never have enough bark! Woof!
5. Cranberry Nut Chocolate Bark
from King Arthur Flour
Ingredients
1 cup dried cranberries
3/4 cup toasted diced pecans
2- 2/3 cups chopped semisweet or bittersweet chocolate, melted
2- 2/3 cups chopped white chocolate, melted
Directions
Toss cranberries and pecans together. Set them aside.
Melt dark chocolate (in the top of a double boiler--see above), and spread into 8" x 12" oval on parchment paper.
Allow chocolate to set, but not harden completely.
Melt white chocolate (in the top of a double boiler-see above) and mix with about 3/4 cup of cranberries and pecans. Spread this over dark chocolate.
Sprinkle rest of nuts and fruit on top, pressing them in gently.
Refrigerate for about 10 minutes--no more than 20-- until hardened, then break into chunks.
Happy Holidays!
White Chocolate Lemon Bark: Kaye Wilkinson Barley
 |
| Photo: Kaye Wilkinson Barley |
Happy Holidays!
KAYE WILKINSON BARLEY:
White Chocolate Lemon Bark
Use 1 package of Log House CandiQuick (Vanilla Flavored) White Chocolate.
Follow directions on back of package for melting in the microwave.
Stir and pour into a large bowl over smashed up Lemon Drops (I used Brach's 9 oz package, and used a hammer to smash em).
Stir, pour out onto a sheet of waxed paper on a cookie tray.
Allow to harden, break into pieces.
Another version is to add 2 packages of the white chocolate to 1 package of lemon drops. It just depends on what you want to do - neither is right or wrong. But either way, it'll be the easiest candy you've ever made (except for the smashing the lemon drops part . . .)
Enjoy!!
Monday, December 22, 2014
Chocolate Figgy Pudding Recipe: Vintage Christmas Cat and Figgy Pudding Cards

How long have you been singing this Christmas Carol? Have you ever had Figgy Pudding aka Christmas Pudding? And what, exactly is it?
One other question, can you add chocolate? Yes! Scroll down for Ghirardelli's recipe for Chocolate Figgy Pudding.
Figgy Pudding is pretty much exactly what it sounds like -- a pudding/cake with figs in it. The reason that it's in such high demand, though, has more to do with its inedible ingredients. Coins, rings and other trinkets were often hidden in the Christmas pudding and each supposedly predicted the recipient's fortune for the coming year. For example, if you found a coin, you would become wealthy. If you found a ring, you'd get married ... and so on. Think of it as an Old English fortune cookie.
From WiseGeek.com:
It's amazing what a brief mention in one Victorian-era Christmas carol can do for an obscure little dessert called figgy pudding. Every year, thousands of people around the world become curious about the dessert mentioned in the secular English carol "We Wish You a Merry Christmas." Apparently, the party-goers mentioned in the lyrics refuse to leave until they get some of this pudding from their host. This must be some seriously good pudding.

In actuality, figgy pudding is more of a cake than a pudding. There have been recipes for it since the 15th century, although its popularity as a Christmas dessert probably reached its peak during the late 19th century. Several factors have significantly hampered the wholesale expansion of the figgy pudding industry, including an interminably long cooking time, an exotic ingredients list and a cringe-inducing dependency on saturated fats for texture.
Ghirardelli Chocolate Figgy Pudding

Ingredients
3 eggs
1-1/2 cups brown sugar
4 cups soft bread crumbs
1 cup finely chopped suet (I use sweet butter)
2 tablespoons flour
1-1/2 cups chopped dried figs
3/4 cup Ghirardelli's Ground Chocolate
1/2 cup hot milk
3/4 tsp salt
Directions:
Beat eggs, add sugar, bread crumbs, suet, figs (dredged with flour), chocolate mixed with hot milk, and salt, stir thoroughly.
Steam three hours in a greased mold.
Serve hot with a hard sauce.
Hard sauce: Great recipe at The Pioneer Woman
Sunday, December 21, 2014
Ice Cream Yule Log aka Bûche de Noël for the Winter Solstice

The tradition of the Yule Log spans millennia and actually precedes Christianity. The Peasants used to burn a yule log on the Winter Solstice in December to keep evil spirits away, which they presumed might come because of the prolonged darkness of the Winter Solstice.
As Christianity grew, the yule log became more commonly associated with Christmas celebrations and Christianity adopted the Yule log tradition. For centuries, Christians cut their own yule logs at Christmas time or they would try to find a yule log to burn. During the 1700s and 1800s, it was a regular Christmas tradition for men to go out in search of a yule log. Many European countries had traditions surrounding the Yule log, but a Yule log was burned either in the days preceding Christmas or on Christmas Eve or Christmas Day.
For the purposes of this blog, the expression "Yule log" has also come to refer to log-shaped Christmas cake or "Bûche de Noël." A few years ago I posted a fabulous recipe for a traditional Buche de Noel.
Here's a simple recipe adapted from the Breyers Ice cream site for a Buche de Noel aka Yule Log Ice Cream Cake. You can always change the ice cream to a flavor you like best. How easy is this?
ICE CREAM YULE LOG aka BUCHE DE NOEL
1 box (16 oz.) angel food cake mix or Duncan Hines Chocolate Cake mix (guess which one I use?)
1 Tbsp confectioners sugar PLUS extra for garnish
1 container (1.5 qt.) Breyers Chocolate Chip Ice Cream (original recipe uses strawberry)
3 large marshmallows
6 mini marshmallows
Unsweetened DARK cocoa powder
1 can (16 oz.) chocolate frosting
Fresh mint sprigs
Cranberries
Ground cocoa nibs
Preparation
1. Preheat oven to 350°. Line 15-1/2 x 10-1/2-inch jelly-roll pan with parchment paper; set aside.
2. Prepare cake mix according to package directions; pour into prepared pan. Bake 22 minutes or until golden brown and toothpick inserted in center comes out clean. On wire rack, cool 15 minutes.
3. Run metal spatula around edges of cake to loosen; sift 1 tablespoon sugar onto cake. Invert onto clean kitchen towel; remove parchment paper.
4. Starting at short end of cake, roll up tightly, jelly-roll style, folding towel into cake; refrigerate 30 minutes or until chilled.
5. On cutting board, unroll cake. With scissors, cut carton from softened (leave out for 10 minutes) Ice Cream (or if you're using another brand of ice-cream, let it soften until you can spread it). Arrange Ice Cream on its side, then cut crosswise into 8 slices. Arrange slices on cake leaving 1-1/2-inch border at one end of cake; pressing to form an even layer. Roll cake up tightly, using towel to help roll cake; freeze 3 hours or overnight. Freeze serving platter 30 minutes before serving.
6. Meanwhile, for ''mushrooms'', with scissors, snip large marshmallows in half crosswise; press mini marshmallows onto sticky side of large marshmallows. Sift cocoa powder over mushrooms; set aside.
7. On cutting board, remove towel from cake. With serrated knife, slice 1-1/2-inch diagonal piece off one end of cake. On chilled serving platter, arrange large ''log.'' Place diagonal slice against side of ''log'' to form ''branch.''
8. Frost "log" and "branch" with chocolate frosting, leaving ends unfrosted. Drag fork across frosting to create "bark"; press on "mushrooms." Return to freezer to firm up.
9. To serve, garnish with cranberries and mint and sprinkle with additional confectioners sugar. Serve on a bed of ground up cocoa nibs!
TIP: The frosting will cover any cracks you may get in the cake when rolling.
Don't have time to do this? The other day I saw Ice Cream Buches de Noel for sale at Baskin & Robbins. You get to pick the ice cream flavor you like. They're ready for take-out or they'll customize it for you.
Photo: Breyer's with strawberry ice cream
Saturday, December 20, 2014
DARK CHOCOLATE EGGNOG TRUFFLES

Dark Chocolate Eggnog Truffles
Ingredients
3/4 cup eggnog
11 ounces dark chocolate 60%+ cacao, chopped
3 Tbsp sweet butter, cut into small cubes
2 Tbsp superfine sugar
1/8 tsp ground nutmeg
1/4 tsp ground cinnamon
Directions
Heat eggnog over medium heat almost to boiling point, whisking constantly. Do not boil.
Immediately remove pan from heat, turn heat to low. Add chocolate and butter to eggnog. Stir until chocolate is completely melted, returning to low heat if necessary.
Pour mixture into mixing bowl and beat with electric mixer at high speed for 5 minutes. Refrigerate for 1 hour or until mixture is firm but pliable.
In small bowl, mix superfine sugar with nutmeg and cinnamon; set aside. (you can also add cocoa)
Take 1 teaspoon of chocolate mixture and roll into ball, then roll in sugar mixture.
Place truffle in foil cup or on waxed paper tray (I don't use cups but they look festive if you do). Repeat.
Store truffles in airtight container in refrigerator.
Don't have time to make Eggnog Truffles?
Starbucks sells Eggnog Latte Truffles.
Godiva has them in their 12 piece Truffle Holiday Box.
Check your local chocolatier!

Friday, December 19, 2014
Chocolate Peppermint Pie with Peppermint Oreo Crust

The original recipe for this Chocolate Peppermint Pie is adapted from the Wisconsin Milk Marketing Board, so there's lots of butter, cream cheese, and whipping cream. I dressed this up even more by adding a Chocolate Peppermint Oreo Crust using Holiday Oreos. I love Trader Joe's Candy Cane Joe Joes. This is a great crust for lots of holiday desserts.
Chocolate Peppermint Pie with Peppermint Oreo Pie Crust
Peppermint Oreo Pie Crust
2 1/4 cups of crushed Trader Joe's Candy Cane Joe Joe's (oreo-like with peppermint filling), finely ground
2 1/2 ounces of melted butter
Combine cookie crumbs with melted butter in a bowl.
Pour mixture into 9 inch pie pan and press into bottom and up sides evenly.
Smooth surface with the back of spoon.
Refrigerate pie crust for at least an hour.
Chocolate Peppermint Pie Filling
Ingredients
1/2 cup sweet butter, softened
8 ounces cream cheese, softened
3/4 cup sugar
1/2 cup pasteurized egg product* (egg beaters or similar product to avoid the raw egg controversy)
1/2 cup whipping cream
1 cup white chocolate chips or white chocolate bar, chopped -- melted and cooled
1/2 cup (20) peppermint candies, crushed
1/2 cup dark chocolate (60-75% cacao) chopped - or 1/2 cup semi-sweet chocolate chips, melted and cooled
some more crushed peppermints candies
Directions
In bowl, beat butter, cream cheese and sugar together.
Combine egg product and whipping cream, and gradually add to butter mixture while beating, scraping bowl often. Beat until light and fluffy, about 5 minutes. Reserve half of mixture in small bowl.
Add cooled white chocolate to remaining half of mixture; beat well. Stir in crushed candy. Spread in pie crust; chill 10 minutes.
Return reserved butter mixture to bowl, add cooled dark chocolate; beat well. Spread over white chocolate layer.
Sprinkle with crushed peppermint candies. Refrigerate at least 2 hours.
* you can always substitute eggs (6 large eggs, but it depends on the size of the eggs, you can always start cracking eggs and measure)
Tips for Making the Very Best Cookies!

Here are a few Cookie Making Tips. Love to hear any tips you have.
COOKIE MAKING TIPS
1. For me the most important 'rule' (this is not a tip) is to make sure you Chill the Dough. DO NOT SKIP THIS STEP. Put the dough in the refrigerator for a few hours or put it in the freezer for 10 minutes. While you're working, if the dough becomes soft, just pop it back in the freezer for a few minutes.
2. Use the Correct Ingredients. If you haven't made the recipe before, follow it exactly and measure the ingredients carefully.
3. Up for debate: Some say that you should always roll out your dough between sheets of Wax Paper, not Parchment, because wax paper peels easily off the top of the dough. If you do this, you can then cut out the cookies, and they'll peel right off the bottom sheet. And, yet, some people swear by parchment. Give them both a try and see what you think.
3. Add Salt and Leavening to Butter and Sugar Mixture. If you really want your salt and leavening well distributed throughout the dough, beat it in with the butter and sugar.
4. Fats are major to the spread of a cookie. Generally speaking, fat equals flat, crispy cookies while less fat equals higher, cake-like cookies. Speaking of fats: Whipped spreads are not good for baking. Use butter, margarine, or shortening (Crisco). I mostly use sweet butter, and I add salt as an ingredient.
5. Sugars: White sugar makes a crisper cookie than brown sugar or honey. Cookies made from brown sugar absorb moisture after baking, so they stay chewy. Most chocolate chip cookie recipes contain both brown and white sugars.
How to keep brown sugar soft? Put a marshmallow or a piece of white bread in the container. The white bread won’t get moldy nor will the marshmallow, and you’ll always have soft brown sugar. I like marshmallow better .. maybe it's just aesthetics.
6. Mixing: Proper mixing is important. Some recipes have a creaming step in which the fat and sugars are beaten together until light-colored and fluffy. Other cookies require a sandy texture, so the fat is cut into the flour. Over-mixing can incorporate too much air into the dough, resulting in flat, overly spread-out cookies. Follow the recipe instructions.
7. Temperature: Unless specified, ingredients should be at room temperature before mixing. Yes, Virginia, take the butter out the night before. For cut cookies, chill the cookie dough before baking. The cookies will hold their shape better. For drop cookies, you can keep them at room temperature before baking; the spoonfuls of dough will spread and flatten out.
8. Equipment and Baking: Not surprising to anyone who bakes, different baking sheets and ovens produce different results. I use rimmed baking sheets (jellyroll pans) for cookies rather than thin flat sheet pans, although some people swear by flat unrimmed cookie sheets. Instead of greasing each baking sheet, I use parchment for easy cookie removal and clean-up. Some of my friends use a silipat liner, but I don't.
9. Use fresh ingredients. I always replace baking soda, flour, spices, and baking powder at the beginning of the season. This goes for chocolate, too, of course! You're working hard on these cookies, and you want the very best ingredients.
10. Making a big batch of cookies? Be sure and cool the cookie sheet before baking another batch. Otherwise your dough might melt, and you'll have weird looking cookies.
11. Be sure and cool cookies on a wire rack. Don't skip this step or the bottoms might become soggy. And, definitely cool completely before storing them.
Love to hear other tips! Please comment!
Thursday, December 18, 2014
Hot Chocolate on a Stick AKA Hot Cocoa on a Stick
 |
| Photo: Ticket Hot Chocolate on a Stick |
Several Chocolate companies make Hot Chocolate on a Stick, but one of my favorites is Ticket Chocolate. Each Hot Chocolate on a Stick is handmade in AmberLee and Andrea’s San Francisco kitchen. They have several varieties including Salted Caramel, 3-Chili, Vanilla Mint, Venezuelan Bittersweet, French Dark Truffle and Belgian Milk.
If you want to make your own, give the following easy recipe a try. As always, use the very best ingredients. I have used all kinds of dark chocolate--something over 65% cacao, fair trade & organic. If you're adding marshmallows, you might want to make your own or buy some really good confections. It will make a difference, but if you don't have any, use what you have. You can cut the marshmallows to size (square) or use minis. You can also wrap individual Cocoa on Sticks in cellophane, add a bow and directions for use. It's the perfect gift. Want to get adventurous? Add other ingredients such as vanilla or chile to your fudge blend. Experiment.
HOT CHOCOLATE ON A STICK
Ingredients
1/2 cup whipping cream
14-oz can sweetened condensed milk
18 oz (about 3 cups) chopped semi-sweet chocolate
4 oz (about 3/4 cup) chopped unsweetened chocolate
25 lollipop sticks
Directions
Line 8 x 8 pan with aluminum foil. Spray foil with nonstick cooking spray.
Place chopped semi-sweet and unsweetened chocolates in large heat-safe bowl.
Pour whipping cream and condensed milk into medium saucepan and whisk until combined.
Put saucepan over medium heat. Bring liquid to a simmer, whisking frequently so condensed milk does not scorch bottom of pan.
Once liquid is simmering, pour hot cream over chopped chocolate and let sit for minute to soften. Begin whisking cream and chocolate together, until chocolate is melted and there's a smooth mixture. It will be fairly thick.
Pour chocolate into prepared pan and smooth into even layer. Allow to sit and firm up overnight, or for 3-4 hours in refrigerator.
Once fudge block is firm, use large, sharp knife to cut into twenty-five pieces (five rows and five columns). For smoothest cuts, rinse knife in hot water and dry between each cut.
Skewer each block with a lollipop stick (make sure they're natural and not colored--or meant for some other craft, as they might contain chemicals).
To make hot chocolate, heat mug of milk (water does not work well) and add a chocolate block on a stick. Allow to sit and soften for minute, then vigorously stir until dissolved.
Store Hot Chocolate On A Stick in an airtight container for up to a week at room temperature, two weeks in refrigerator, or up to a month in the freezer.
Get Fancier: How to use a cube mold and add marshmallows. See recipe here on 30 Pounds of Apples
Homemade Chanukah Gelt: Coins and Truffles

There are many chocolatiers who sell Chanukah Gelt, and some of it is very tasty, but if you want the very best, make your own!
The first recipe for Homemade Chanukah Gelt is from Oh Nuts! Sweet & Crunchy blog and is pretty traditional in appearance. This Chanukah Chocolate Gelt is fun to make with kids. Easy and quick. Perfect for the Holiday!
The second recipe is for Chocolate Truffle Gelt. The truffles can't really be flattened like a coin, but you can individually wrap them in gold foil to mimic the gold coins. Each truffle contains less than 1/8th teaspoon alcohol, that helps to "cook" the yolks in the mixture. One Tablespoon of orange juice can be substituted, but it will slightly alter the taste and consistency.
And, you don't have to be Jewish to enjoy any of this Chanukah Gelt!
HOMEMADE CHANUKAH GELT
Ingredients
8 oz (about 1-1/3 cups) melting chocolate wafers (or dark or milk chocolate)
2 mini muffin tins
Gold luster dust
Clean food-safe paintbrush
Directions
Put chocolate wafers in microwave-safe bowl. Microwave wafers in 30-second increments, stirring after every 30 seconds, until melted and smooth. Alternatively, you can melt the chocolate in a double boiler or in a saucepan over a saucepan over simmering water.
Drop a spoonful of melted chocolate into 24 mini muffin cavities. Don't use a lot if you want them to look like coins.
Hit muffin pans against counter to level out chocolate and reduce “peaks” on top of chocolate. Refrigerate pans until chocolate is completely set, about 20 minutes.
Turn pans upside-down over clean surface, and flex to release the coins. If some stick in pan, knock on bottom of tin to dislodge the coins.
Use clean, dry food-safe brush and brush luster dust over the surface of coins. Luster dust and water do not mix, so don’t get any fancy ideas about mixing them together to make gold paint–you’ll just end up with a mess. Dry brushing works better.
If you don't want to use the luster dust, you can wrap the coins in gold foil and press a coin pattern (or not) into the foil (preferably while still a bit soft).
CHOCOLATE TRUFFLE GELT
Ingredients
6 ounces dark or milk chocolate
1/4 cup sweet butter
2 egg yolks
1 Tbsp coffee liqueur, cognac, or Grand Marnier
Dried sweetened cherries
Cocoa
Gold foil paper
Directions
Put chocolate in one quart bowl and place in saucepan filled halfway with hot but not boiling water. Over low heat, melt chocolate and stir to remove any lumps. Remove bowl of chocolate from hot water bath.
Cut butter into 4 pieces and whisk in, one piece at a time, until smooth.
Whisk in yolks until thoroughly combined. (Mixture might look grainy and separated. Don't worry about using raw yolks; the yolks will essentially be "cooked" by alcohol in liqueur.) Then whisk in the cognac or other flavoring.
Cover and refrigerate for hour, or until mixture is firm but not rock hard.
Working quickly, place heaping teaspoon of chocolate in hand. Press dried cherry into center of chocolate and shape into ball, about an inch in diameter, covering the fruit.
Roll truffle in cocoa. Place on plastic wrap-lined plate, cover with additional wrap, and refrigerate until firm (about 30 minutes for dark chocolate and 15 minutes longer for milk).
To create "coins," wrap truffles in gold foil.
Wednesday, December 17, 2014
Maple Syrup Day: Chocolate Maple Syrup & Chocolate Maple Syrup Truffles
 Today is National Maple Syrup Day. When I was young, we traveled to Canada, Maine, and Vermont for fishing trips (my father was a fresh water fisherman). One of my fond memories was seeing the taps in the maple trees in the woods. So magical to me.. a city kid. They were just like beer taps (or for me at that age, they probably looked like soda fountain taps). Tapping the trees for maple syrup was always the highlight of these trips. This experience broadened the school history lesson about the early settlers and Maple Syrup. Of course the indigenous people tapped the trees first, but that wasn't part of our lesson.
 An individual maple tree can be tapped one to three times per year (depending on how big the diameter of its trunk is), producing up to 13 gallons of sap per one to two month harvesting season. Maple trees keep the starch inside their roots and trunk before winter sets in which is then later converted to sugar that appears in the tree's sap in winter and early spring.
It is the starchy sugar that makes maple syrup so characteristically sweet. In order to turn sap into sugar, it's heated and boiled to evaporate the excess water, with the concentrated syrup remaining. Sugar shacks were set up for this process, and those were also available for viewing in small Vermont and Canadian towns. I imagine they still are.
Want to know more about the history of Maple Syrup? Read "Tapping into the history of maple syrup" at Chronically Vintage.
What to do with maple syrup? Well, growing up, maple syrup at our house came in a little crock and was only used to pour over waffles and pancakes. But Maple Syrup is actually a great item to have in your pantry and can be used in lots of ways. Maple syrup is a healthy alternative to sugar in baked goods and desserts.
Conversion tips:
Substitute an equal amount of maple syrup for sugar.
For each cup of syrup, reduce the quantity of liquid ingredients in the recipe (water, milk, juice) by about a quarter of a cup.
Maple syrup can also serve as a one-to-one substitution for other liquid sweeteners, such as honey, molasses and corn syrup.
And, with the holidays coming up, here are two great recipes to make and give or serve: Chocolate Maple Syrup and Chocolate Maple Truffles.
CHOCOLATE MAPLE SYRUP
Ingredients
1-1/2 cups pure maple syrup
4 Tbsp unsweetened DARK cocoa powder
1/4 cup sweet butter, chopped
Pinch of salt
Directions
Heat maple syrup in small sturdy saucepan over moderate heat until hot.
Whisk in cocoa powder, butter, and pinch of salt. Turn down to simmer and whisk for a minute.
Serve syrup warm.
Syrup keeps, covered and chilled, 1 week.
CHOCOLATE MAPLE TRUFFLES
This recipe is from the Pure Canadian Maple Syrup site.
Ingredients for Centers
1/2 cup pecans, toasted
4 ounces bittersweet chocolate
2 cups dates, pitted and chopped
2 Tbsp pure maple syrup
1 Tbsp orange juice, just squeezed
1 Tbsp Grand Marnier or other liqueur optional
Ingredients for Coating
8 ounces premium quality bittersweet chocolate
1/4 cup unsweetened cocoa powder, sifted
Directions
To prepare the centers, melt 4 ounces of bittersweet chocolate in double boiler over gently simmering water until completely melted, stirring only once or twice. Set aside.
Chop dates by hand, so they're not sticky (can become sticky if you use a food processor) If you are using food processor, place pecans in with the dates and pulse.
Add melted chocolate, Maple syrup, orange juice and liqueur; pulse until mixture just comes together. Alternatively, you can mix the ingredients together by hand in a medium mixing bowl.
To form and coat truffles, prepare coating:
Melt remaining 8 ounces of bittersweet chocolate over double boiler of gently simmering water and cool to about 90°. While chocolate is cooling, form truffles. Line cookie sheet with parchment paper. Form truffles into small tiny bite sized balls. Place cookie sheet of truffles to tleft of you. Place melted chocolate in front of you and have sifted cocoa to right of you To tfar right have cookie sheet lined with parchment paper and or paper truffle cups ready to place coated truffles.
CHOCOLATE CAKE MIX COOKIES: Guest post by Sue Trowbridge

Sue Trowbridge:
Chocolate Cake Mix Cookies
I baked some cookies on Saturday and brought a dozen over to a friend's house the next day. When she told me how much she'd enjoyed them and asked me for the recipe, I realized I had no choice but to admit just how easy they are to make -- all you need is a box of cake mix and a few other ingredients you probably already have in your kitchen! Then I decided it would be fun to share with anyone who might be looking for a super-simple recipe to try during this busy season.
The recipe is from Betty Crocker, and I used their Supermoist Chocolate Fudge Cake variety.
Chocolate Cake Mix Cookies
Ingredients
1 box chocolate cake mix (18.25 ounce box)
1/3 cup vegetable oil
1 tsp vanilla
2 eggs
1/4 cup granulated sugar
Directions
Heat oven to 350°F (325°F for dark or nonstick pans). In large bowl, mix cake mix, oil, vanilla and eggs with spoon until dough forms.
Refrigerate dough 15 to 30 minutes or as needed for easier handling. Shape dough into 1-inch balls; roll in sugar. On ungreased cookie sheets, place balls about 2 inches apart.
Bake 9 to 11 minutes or until set. Cool 1 minute; remove from cookie sheets to cooling racks. Cool completely, about 30 minutes. Store tightly covered.
Tuesday, December 16, 2014
Grand Marnier Truffles

GRAND MARNIER TRUFFLES
Ingredients
2/3 cup heavy cream
1tsp fresh orange zest
12 ounces dark chocolate (60-70% cacao), chopped
1 Tbsp plus 1-1/2 tsp Grand Marnier
1/3 cup DARK cocoa
Directions
In saucepan over medium heat, bring the heavy cream and orange zest just to a boil.
Remove from heat.
Add chopped chocolate and Grand Marnier and stir until smooth.
Chill chocolate mixture (ganache) until hard enough to roll into balls.
Using two spoons or melon baller, extricate chocolate and roll into ball.
Roll ball in cocoa powder and chill.
This recipe can be doubled. Experiment with different chocolate -- brands and amount of cacao -- for different flavor.
Grand Marnier Hot Chocolate

Grand Marnier, an orange flavored brandy, has been an icon of authentic French "joie de vivre" for over 150 years. Still owned by the Marnier Lapostolle Family, this acclaimed liqueur has a luxurious taste and still uses the same secret recipe. Grand Marnier is a blend of Cognac, distilled essence of bitter orange, and sugar.
One of the most important ingredients in Grand Marnier is Citrus Bigaradia Oranges. This variety of tropical orange stands apart from the sweet oranges we usually eat as it is bitter and has an intense aroma. Though the Citrus bigaradia is not a particularly rare orange, the way in which the oranges are harvested and then distilled to obtain the orange essence that goes into Grand Marnier® liqueur is very specific. The oranges are handpicked while they are still green-- when they are at their most aromatic. In order to preserve optimal concentration of the aroma of the peels, they are left to dry naturally under the Caribbean sun for several weeks on the Marnier Lapostolle family plantation. Their slow distillation extracts an orange essence that is particularly aromatic.
Oranges and Chocolate go so well together that Grand Marnier Hot Chocolate is a perfect match! Here's a recipe I've posted before. It's a favorite, and so easy.
Some additions or alternatives: To spice this up, add 1/4 tsp of cayenne pepper to each mug. You can also make your hot chocolate from scratch using your choice of dark chocolate. Mix some Grand Marnier into the whipped cream for a double treat on this fun holiday!
GRAND MARNIER HOT CHOCOLATE
Ingredients
2 ounces Grand Marnier
3 Cups Hot Chocolate (I like Scharffen Berger)
1/2 Cup whipping cream, lightly whipped
Orange Peel (or zest) for garnish
Directions
1. Make hot chocolate according to package directions (or follow your favorite recipe-- I use whole milk when making hot chocolate).
2. Pour one ounce of Grand Marnier into each mug and fill mug with hot chocolate.
3. In a bowl whip fresh cream and spoon on top of hot chocolate.
4. Grate some orange zest over the top or add a curled orange peel.
And here's a fun Grand Marnier advertisement from 2011! Very French!
Wouldn't it be great to be in Paris for Christmas?
Monday, December 15, 2014
Layered Mint Chocolate Fudge Recipe: Lesa Holstine

If you follow this blog, you might remember that Lesa has been a guest before with her fabulous Buckeyes. For Christmas, her mother, Elizabeth Growel, always makes Layered Mint Chocolate Fudge. Her Mom uses mint instead of peppermint because that's the flavor the family likes best. As Lesa says, "It's the Perfect Christmas Fudge."
Lesa Holstine writes an awesome blog, Lesa's Book Critiques. She has been a library manager/administrator for over 30 years, in Ohio, Florida, Arizona, and Indiana. She is the Winner of the 2011 Arizona Library Association Outstanding Library Service Award. She is a contributing Book Reviewer for Library Journal, Mystery Readers Journal, The Strand Magazine, and various websites. And, she loves Chocolate!
Layered Mint Chocolate Fudge
Ingredients
2 cups (12 oz pkg) semi-sweet chocolate chips
1 (14 ounce) can Eagle Brand Condensed Milk, divided
2 tsp vanilla extract
6 ounces white confectioners coating or 1 cup (6 oz) premium white chocolate chips
1 Tbsp peppermint extract (Mom uses mint)
Green or red food coloring (optional)

Directions
Line 8- or 9-inch square pan with wax paper or foil
Melt chocolate chips with 1 cup sweetened condensed milk in heavy saucepan over low heat; add vanilla. Spread half the mixture into prepared pan; chill 10 minutes or until firm. Hold remaining chocolate mixture at room temperature.
Melt white confectioners' coating/white chocolate chips with remaining sweetened condensed milk in heavy saucepan over low heat (mixture will be thick). Add peppermint or mint extract and food coloring, if desired. Spread on chilled chocolate layer; chill an additional 10 minutes or until firm.
Spread reserved chocolate mixture on mint layer. Chill 2 hours or until firm. Remove from pan by lifting edges of wax paper; peel off paper. Cut into squares.
Sunday, December 14, 2014
Chocolate Marshmallow Dreidels for Chanukah

You won't be spinning these tops unless you want chocolate all over the floor, but making these Chocolate Marshmallow Dreidels is a fun activity to do with children.
This recipe is adapted from Martha Stewart's recipe for Chocolate Marshmallow Dreidels. If you want to take it up a notch, make your own marshmallows or buy some high end marshmallows made with natural ingredients such as those from Recchiuti. I usually use whatever dark chocolate I have, but you can use any great organic fair-trade chocolate. For the white chocolate I used Green & Black's White Chocolate that's made with Madagascar vanilla. I also used Paul Newman's Own Organic pretzel sticks. They are a little long, so I snap them in half.
Apologies for the poor caligraphy. Practice makes perfect, and I'm very out of practice. :-)
CHOCOLATE COVERED MARSHMALLOW DREIDELS
Ingredients
12 chocolate kisses (I use Hershey's Kisses)
8 ounces melted dark chocolate
12 marshmallows (homemade or whatever you have)
12 thin pretzel sticks (I use Newman's Own)
2 ounces melted white chocolate (I use Green & Black)
Directions
1. Dip bottom of chocolate kiss in melted semisweet chocolate. Press onto marshmallow; transfer to parchment-lined baking sheet. Repeat to make 12 dreidels. Refrigerate for 10 minutes.
2. Cut small slit in bottom of each marshmallow (spray your scissors with PAM); insert 1 thin pretzel stick. Dip dreidels in dark chocolate, and return to baking sheet. Refrigerate until set, about 15 minutes.
3. Fill plastic bag or pastry bag with melted white chocolate; cut a tiny opening in corner, and pipe Hebrew letters onto 3 sides of each dreidel. I used a pastry bag with a tip, but I should have practiced a bit first so I wouldn't have any drips.
4. Refrigerate at least 5 minutes or up to 8 hours before serving.
Happy Hanukah: Chocolate Sufganiyot

One of the special foods at Chanukah time is Sufganiyot (singular: sufganiyah): deep fried donut balls stuffed with jelly, or custard (for this blog that would be chocolate custard) and topped with sugar. Of course, you can also stuff them with dark chocolate! I didn't grow up with this tradition, but any food that's fried and stuffed is good in my book. Sufganiyot are really an Israeli tradition, but they've gained popularity in the U.S.
There are many recipes for Sufganiyot. Go here for a yeasted Sufganiyot Dough recipe or here on Epicurious (remember to stuff with chocolate) or this recipe from Amanda Gold in the Chronicle.
I'm a huge fan of Katrina's Vosges Haut-chocolate blog, and she posted a fabulous recipe for Sufganiyot, chocolate filling, of course, in 2009. Be sure and visit her blog for insights. She, like I, thinks that Sufganiyot are a lot like Beignets. So you might want to check out this simple no frying, no yeast dough recipe I posted for Chocolate Beignets. Make them ahead and pop them in the oven when your guests get there.
Chocolate Sufganiyot from Vosges Haut-chocolat
Ingredients
3/4 cup warm water (about 100 degrees)
 1 envelope active dry yeast (1 scant tablespoon)
2 1/2 cups all-purpose flour, plus more for work surface
1/4 cup sugar, plus 1/2 cup for coating
1/2 tsp salt
2 large eggs, separated
2 Tbsp sweet butter, room temperature
peanut oil, for frying plus more for bowl
1/4 cup Vosges Haut-Chocolat Candy Bar
Directions
In large metal bowl, stir together warm water and yeast. Let stand until foamy, about 5 minutes. Add 3/4 cup flour, 1/4 cup sugar, and salt; mix until well combined. Add egg yolks and remaining 1 3/4 cups flour. Mix until combined, then knead dough in bowl until all flour is incorporated. Turn out dough onto a lightly floured work surface; knead a few minutes until smooth. Knead in margarine until incorporated.
Transfer dough to a well-oiled bowl; turn dough several times to coat entirely with oil. Cover tightly with plastic wrap, and refrigerate overnight.
About 30 minutes before you’re ready to form doughnuts, remove dough from refrigerator to let come to room temperature. On a lightly floured work surface, roll out dough into an 11 inch square about 1/8 inch thick. Using a 2 inch cookie cutter (or a glass), cut out about 24 rounds, dipping cutter in flour as needed to prevent sticking. Re-roll scraps and cut out about 16 more rounds.
Line a baking sheet with a clean kitchen towel. In a small bowl, lightly beat egg whites. Brush edge of a dough round with egg white, then mount 1/2 teaspoon chocolate bar pieces in center, or both. Top with another round and press edges to seal. Repeat process with remaining rounds. Transfer to prepared baking sheet; let doughnuts rise until puffy, 20 to 30 minutes.
Heat a few inches of oil in a large (4-5 quart) heavy pot until it registers 360 degrees on a deep-fry thermometer or a scrap of dough sizzles upon contact. Working in batches of 4 to 5, carefully slip doughnuts into hot oil. Fry, turning once until golden brown about 1 minute. Using a slotted spoon, transfer doughnuts to paper towels to drain.
Place remaining 1/2 cup sugar in a medium bowl. While doughnuts are still hot, toss them in sugar, turning to coat. Serve immediately.
Sufganiyot Photo: Vosges Haut Chocolat
Saturday, December 13, 2014
Swedish Chocolate Balls: Chokladbollar

Sue Trowbridge: Chokladbollar
This is a no-bake recipe, and it’s super easy and fun for kids. I used to make these when I was a youngster. Oh, and before you ask, no, these are not related to another Christmas treat, Schweddy Balls.
You’ll need 7 tablespoons of softened butter and 2/3 cup of sugar. Stir them together well — this step requires strong arms!
The recipe calls for a tablespoon of strong coffee (liquid). I rarely make coffee at home — I’m mainly a tea gal — but luckily, my parents had left some in the freezer so I had some on hand.
Add the coffee, a teaspoon of vanilla and two tablespoons of cocoa to the butter/sugar mixture.
Add 1 1/3 cup of quick oats. Stir, stir, stir!
The result looks a little bit like my mom’s Swedish meatball mixture.
Using 1 teaspoon of mixture at a time, roll into small balls. Roll these in coconut, coating well. It will make your hands extremely greasy and messy, which meant I had to stop in the middle and wash my hands so I could take this picture. It can be difficult to serve as both chef and photographer!
The result. You will want to eat them immediately, but don’t — stick ‘em in the fridge for an hour or two, or, in a pinch, the freezer for about half an hour.
I made these to bring to a holiday party, and they disappeared quickly, but then again, so did pretty much everything. Still, I like to imagine that the people who managed to get one enjoyed it. I’m still annoyed that I missed out on my friend Trish’s chocolate bark with Australian sea salt because I didn’t get to the dessert table quickly enough…
Here is the recipe in full:
 Chokladbollar
7 Tbsp butter
2/3 cup sugar
1 tsp vanilla
1 Tbsp strong coffee (liquid)
2 Tbsp cocoa
1 1/3 cups quick oats
1/2 cup coconut for coating
Cream butter and sugar. Stir in vanilla, coffee, cocoa, and oats. Mix well. Using 1 teaspoon of mixture at a time, roll into small balls. Roll these in coconut, coating well. Refrigerate. Makes about 30.
Subscribe to:
Posts (Atom)