Pages

Saturday, August 31, 2024

EASY BLACKBERRY CHOCOLATE CHIP PIE for Labor Day Weekend

Labor Day Weekend. When I was growing up that Labor Day weekend meant the last weekend before school started. We'd go down the shore or up to the mountains, or just kick back at a neighborhood barbecue. Sometimes we'd go to the country and pick blackberries for jam and pies. When I moved to California, I found blackberries everywhere at this time of year -- by the roadside, in the fields, and later in my own backyard! They were a bit of a bramble, prickly bushes, but the blackberries were, oh so, sweet and plentiful!

I used to make an awesome Blackberry Apple Pie, but since this is a Chocolate blog, and this is Labor Day Weekend, I'm recommending this easy and delicious Blackberry Chocolate Chip Pie. I adapted a recipe I found at Allrecipes. com, and there was a caveat with the original: "Adjust the ratio of berries and chocolate chips to suit your preferences." Well, that's wise, so you might have to make it several times, just to get it right.

EASY BLACKBERRY CHOCOLATE CHIP PIE

Ingredients
1 (15 ounce) package pastry for a 9 inch double crust pie (I use Trader Joe's pie crusts if I don't make my own)
1/2 cup granulated sugar
1/3 cup all-purpose flour 
1/2 teaspoon ground cinnamon
4 cups blackberries
1/2 cup dark chocolate chips or chopped chocolate
1/2 Tbsp lemon juice

Directions
Preheat oven to 425 degrees
Place one pie crust in bottom of 9 inch pie plate.
In bowl, mix sugar, flour, and cinnamon. Gently stir in blackberries and chocolate chips. Sprinkle with lemon juice. Transfer to pie crust in pie plate.
Put second pie crust on top, and secure to bottom crust by pressing with fork, or fluting with fingers. Bake 35 minutes in preheated oven, until top is golden brown. Cool slightly before slicing.

Friday, August 30, 2024

HOT CHOCOLATE TOASTED MARSHMALLOW COOKIES: National Toasted Marshmallow Day!

Happy Toasted Marshmallow Day! Perfect for Labor Day Weekend! Even if you're not out camping and toasting marshmallows by the fire, you can still celebrate the day with these Hot Chocolate Toasted Marshmallow Cookies! They're fabulous and easy! Recipe from Ghirardelli Chocolate 


HOT CHOCOLATE TOASTED MARSHMALLOW COOKIES

INGREDIENTS
3/4 cup Ghirardelli 60% Cacao Bittersweet Chocolate Baking Chips
1 cup plain flour/ all-purpose flour
1 Tablespoon Ghirardelli Unsweetened Cocoa Powder
1/2 teaspoon baking soda
1/4 teaspoon salt
6 Tablespoons butter, softened
1 cup soft brown sugar
2 small eggs
1 teaspoon vanilla extract
2 1/4 cups Ghirardelli 60% Cacao Bittersweet Chocolate Baking Chips
16 large marshmallows

DIRECTIONS
Melt chocolate gently in microwave or over pot of simmering water. Set aside to cool.
Sift all of dry ingredients together in bowl and stir together.
Beat butter and sugar together until thick and creamy.
Beat in eggs one by one.
Add in cooled melted chocolate and vanilla extract. Continue beating until ingredients are well mixed.
Fold dry ingredients into mix and fold in chocolate chips until combined.
Scoop cookie with 1 tablespoon scoop (if mix is soft, pop into fridge to stiffen up and make it easier to scoop).
Bake at 350°F for 8 - 9 minutes. Do not overbake as these cookies should be almost brownie-like.
Once baked, pop a marshmallow on top and put it back in oven on broil for 1-2 minutes for a lovely toasted effect.  (or use a mini-torch)

About The Ghirardelli Chocolate Company
The Ghirardelli Chocolate Company is a manufacturer and marketer of premium chocolate products. Incorporated in 1852, Ghirardelli has the richest heritage of any American chocolate company. Ghirardelli continues to honor its heritage to this day. Ghirardelli is one of the few companies in America that controls the entire chocolate manufacturing process, from cocoa bean to finished product. This control over the manufacturing process, combined with Ghirardelli’s proprietary bean blend and unique methods of roasting and processing, ensures that you are rewarded with the high quality and rich products.

Thursday, August 29, 2024

LEMON CURD BROWNIES WITH HOME-MADE LEMON CURD: National Lemon Juice Day!

Today is National Lemon Juice Day. I have several lemon trees, including three prolific Meyer lemon trees that are perfect for making lemon curd. I love this recipe for Lemon Curd to use in Lemon Curd Brownies.

A few years ago after my Mother passed away, while going through her correspondence, I came across a note and recipe from an English friend of hers who wrote, "As promised here's the recipe and a little supply of my lemon curd for you." Unfortunately, the lemon curd was not in the cupboard or refrigerator. I'm sure it had been eaten promptly. My mother loved lemon, and I do, too, especially with chocolate.

Since then I've been making Lemon Curd Brownies using "Elaine's Lemon Curd" recipe. Here's the recipe from "Elaine's" note. Be sure and scroll down for the Lemon Curd Brownie Recipe! Of course, you can always use store bought Lemon Curd, but try making your own. It's easy and delicious, and you can adjust the recipe as you see fit!

LEMON CURD


LEMON CURD BROWNIES

This recipe is very loosely adapted from Coffee & Quinoa. Go there for fabulous photos!

Ingredients 
4 ounces dark chocolate
3/4 cup unsalted butter
1 1/2 cups granulated sugar
3 large eggs
1 tsp pure vanilla extract
1 cup all purpose flour
1/2 tsp salt
2 cups dark chocolate, chopped into chunks  (or chocolate chips)
1 cup lemon curd

Directions
Preheat oven to 350.
Line 9 x 9 baking pan with parchment and grease with cooking spray or butter.
Melt chocolate and butter in top of double boiler, or in saucepan over another saucepan over simmering water. Take off stove. Stir in sugar. Beat in eggs and vanilla. Stir in flour and salt. Fold in chocolate chunks.
Spread 2/3 of batter into baking pan. Spread lemon curd on top. Put remaining batter on top, spreading to cover lemon curd completely.
Bake for 40-50 minutes, or until toothpick inserted in center comes out with crumbs.

Wednesday, August 28, 2024

CHOCOROONS: Retro Ad with Recipe


I came across this recipe from 1964 recently and knew I had to share. I love Retro Ads with Recipes. This recipe for Chocoroons was the Pillsbury Bake-off prize winner from Mrs. Oscar Carlson of Elm Creek, NE. Notice it's a very old ad and contest since we don't have Mrs Carlson's first name, but that of her husband. Hmmm... Nevertheless it's a good recipe. Scroll down for Ad with Recipe.


A few notes:
1. Instead of Nestle's Quick Chocolate Mix, use your favorite cocoa (not too dark)
2. Sadly you can't enter the 16th Bake-off where you could win $25,000 (longtime passed)

From the Pillsbury websiteHOW THE BAKE-OFF® CONTEST BEGAN

Before there was “Top Chef,” before there was “Cupcake Wars” or “Hell’s Kitchen,” there was the Pillsbury Bake-Off® Contest. The legendary baking competition was introduced in 1949 in honor of Pillsbury’s 80th birthday and as an effort to promote Pillsbury™ Best® flour. At the heart of the Bake-Off was the desire to create an opportunity for American homemakers to not only share their beloved recipes, but to also share the stories that go along with them.

Originally called the “Grand National Recipe and Baking Contest,” 1949’s inaugural Bake-Off received thousands of entries from across the country. As we mentioned, Pillsbury Best flour was a required ingredient in all recipe submissions and there were six categories that participants could enter: breads, cakes, pies, cookies, entrees and desserts. If participants submitted a seal from the Pillsbury Best flour they used in the recipe, their prize money could be doubled.

A panel of Pillsbury home economists eventually narrowed the entries down to 100 finalists. Each finalist was invited to the live competition at the Waldorf-Astoria hotel in New York City to make their recipe in hopes of winning the $25,000 grand prize.

And the guest of honor at the very first Bake-Off? None other than First Lady Eleanor Roosevelt, who was personally invited by Philip W. Pillsbury to attend the event and assist in awarding prizes. 


Tuesday, August 27, 2024

DOUBLE CHOCOLATE BANANA BREAD: National Banana Lovers Day

Today is National Banana Lovers Day, so"Go Bananas" and whip of this Double Chocolate Banana Bread to celebrate! This is an easy recipe adapted from Hershey's Kitchens and one of my go-to recipes. As always, use the very best chocolate and cocoa for the best flavor.

DOUBLE CHOCOLATE BANANA BREAD

Ingredients 
1/2 cup unsalted butter, softened
1/2 cup dark brown sugar
1/4 cup white sugar
1 egg
1 1/2 tsp pure vanilla extract
3 ripe bananas, mashed
1/4 cup sour cream
1 cup all purpose flour
1/2 cup Dutch Process Cocoa
1 tsp baking soda
1/4 tsp salt
1 cup Dark Chocolate Chips or Dark Chocolate Chopped, divided

Directions 
Preheat oven to 350°F and spray a 9 x 5-inch loaf pan with nonstick spray.
In large bowl, add softened butter, brown sugar, and white sugar and beat until combined. Add egg, vanilla, bananas, and sour cream and continue to beat until mixture is smooth.
In separate bowl sift together flour, cocoa powder, salt, and baking soda. Add flour mixture to banana mixture and stir until well combined. Mix in half of dark chocolate chips or chopped chocolate. Pour batter into prepared loaf pan and evenly sprinkle remaining dark chocolate chips over loaf.
Bake for 65–70 minutes or until toothpick inserted comes out clean.
NOTE: you might get a bit of chocolate on your toothpick; make sure you insert the toothpick where there are no chocolate chips.
Remove loaf pan from oven and let cool completely. Run knife around the edges of the bread and invert onto cutting board. 


Monday, August 26, 2024

HOMEMADE DOG BISCUITS: National Dog Day!


Today is National Dog Day, so in celebration I'm posting a recipe for Homemade Dog Biscuits. This particular recipe is also good for fighting plaque build up. And, needless to say there is no chocolate in these biscuits. Chocolate is dangerous for dogs, often life-threatening.

HOMEMADE DOG BISCUITS

Ingredients
3/4 cup powdered skim milk
1/2 cup stone ground cornmeal
1/4 cup bulghur wheat
1-1/4 cups whole wheat flour
1 chicken bouillon cube
1-12/ cups boiling water
1 cup quick cooking rolled oats
1 egg, beaten

Directions
In mixing bowl, combine powdered skim milk, cornmeal, bulghur wheat, and flour. Set aside
In large mixing bowl, dissolve bouillon cube in boiling water. Add rolled oats and let stad about 5 minutes. Stir in beaten egg.
Slowly stir in dry ingredients, half cup at a time, until well blended. Blend last few cups with hands.
Divide dough into 2 balls.
Knead each dough ball on floured surface (5 minutes)
With rolling pin, roll dough between 1/4" to 1/2" thickness
Cut with Bone shaped Biscuit Cutter (or another cookie cutter) and put on baking sheet lined with foil.
Bake 50 minutes at 325.
Turn of oven and let biscuits cool for several hours or overnight, in the oven.
Store at room temperature in container with lose-fitting lid. 


Sunday, August 25, 2024

BANANA SPLIT: History & Recipe (with Hot Dark Chocolate Sauce) for Banana Split Day

Today is National Banana Split Day, and everyone knows a good banana split needs a good Hot Dark Chocolate Sauce. Following is a great recipe for an easy Dark Chocolate Sauce.

The Birth of the Banana Split like so many food creations does not have a clear invention history. Latrobe, PA claims that the banana split was invented by Dr. David Strickler, who in 1904 was a 23 year-old working at Tassell Pharmacy. This sundae originally cost 10 cents, twice the cost of other sundaes. Dave Strickler, a pharmacist and optician, purchased the pharmacy which was renamed "Stricklers." His banana splits were a big hit with the students from nearby Saint Vincent College and the word spread. According to his daughter, her dad "was always the great experimenter," and he even originated the first banana split dish: "There were no dishes for such a concoction, so he drew up his own," and a company in nearby Grapeville produced it.

The banana split was also showcased at the Boston convention of the National Association of Retail Druggists in 1905. Stinson Thomas, chief dispenser at Butler's Department Store in Boston promoted the banana split there. According to an article about the convention in The Soda Fountain magazine, "among all the beverages dispensed here, none was more novel with the ladies than the banana split." The magazine also quotes Mr. Thomas: "My trade here is always looking for something new and so, one day it occurred to me that I might prepare a popular fountain beverage with a banana. I sent my boy out to buy half a dozen bananas, and when he returned I cut off the ends of a banana, split it open, put a portion of ice cream on top and a spoonful of crushed strawberries. It certainly looked swell, and I believed that the public would like it. As with most new creations though, there was some trial and error. At first we left the peel on the banana in the plate, but some time ago we began removing it altogether. We found that the ladies preferred to have the peel removed."

Banana Split

"Split" Bananas (with peel on) lengthwise. Mix sugar and cinnamon and sprinkle on the cut sides of bananas. Let sit for several minutes. Grill bananas cut side down on direct heat for 2 minutes. Turn (with tongs) and cook 5 more minutes. Remove skins. Put bananas in bowl. Add vanilla ice cream (or other flavors, if your prefer). Pour Hot Dark Chocolate Sauce over. Sprinkle with nuts and add whipped cream--with a cherry on top!

Hot Dark Chocolate Sauce

Ingredients
1/3 cup heavy whipping cream
2 tablespoons unsalted butter at room temperature
8 ounces Dark chocolate - 65-75% cacao, chopped
2 Tbsp superfine sugar
1/8 cup Kahlua
1/2 tsp pure vanilla

Directions
Heat cream in small saucepan until almost boiling.
Add butter and sugar. Stir to combine.
Remove from heat and pour over chocolate.
Whisk until melted and combined.
Add Kahlua and vanilla. Stir until cool to touch.
Cover with plastic wrap and set aside or refrigerate.

Illustration: Triple Banana Split Boy, written by my friend Lucha Corpi. Illustrated by Lisa Fields. (Arte Publico Press)

Saturday, August 24, 2024

PEACH PIE WITH CHOCOLATE CRUST: National Peach Pie Day

The other day was National Eat a Peach Day, this month is Peach Month, and today is National Peach Pie Day. Lucky for me there are so many varieties of fresh peaches at the Farmers Market.

So today in honor of the holiday (s), I'm making a Chocolate Peach Pie. I've found that adding chocolate to the peach filling is way too sweet and gooey, so I'm keeping it simple. The chocolate in the following recipe is a traditional chocolate cookie crust made with chocolate wafers. BTW: Nabisco no longer makes Famous Chocolate Wafers, but there are all kinds of substitutes. Check your market or online. The peach filling is simple, but feel free to substitute your favorite peach pie filling.

This peach pie is best served chilled, but there are plenty of other recipes out there for a warm peach pie, if you prefer.

PEACH PIE WITH CHOCOLATE CRUST

CHOCOLATE CRUST 
As I mentioned above, you'll need to look for chocolate wafers (Trader Joe's or other markets or online), or buy chocolate crumbs online. I'll have a post about this soon. So sad that Nabisco no longer makes it Famous Chocolate Wafers. 

Ingredients
2 cups chocolate wafers
6 Tbsp unsalted butter (or salted if you're inclined)

Directions
Melt butter.
Put chocolate wafers in plastic bag and crush with spoon or rolling pin. Should be pea-size.
Combine melted butter and ground chocolate wafers.
Press ingredients into 9 inch buttered pie pan--bottom and up the sides.
Bake for 10 minutes at 325. Let cool.

FRESH PEACH FILLING

Ingredients
1 cup sugar
3 Tbsp cornstarch
Peeled Fresh Peach halves (pitted)
1/2 pint heavy cream

Directions
Mix sugar and cornstarch.
Cover inside of chocolate cookie crust with 3/4 of mixture. Go out to sides.
Arrange peeled peach halves around outside edge (insides of peaches up).
Fill in with other peaches until full.
Sprinkle rest of mixture over peaches.
Put cream inside each peach center.
Bake at 325 for about 30-40 minutes.
Chill and serve.

Thursday, August 22, 2024

CHOCOLATE PECAN TORTE: 2 Recipes for Pecan Torte Day!


Today is
National Pecan Torte Day.  A Torte is not the same as a Pie.  Here's a definition from Wiki:
A torte is a cake made primarily with eggs, sugar, and ground nuts instead of flour. Variations may include bread crumbs as well as some flour. Tortes are Central European in origin. The word torte is derived from the German word Torte, which was derived from the Italian word torta, which was used to describe a round cake or bread.
Tortes are commonly baked in a Springform pan. An element common to most tortes is sweet icing. (Exceptions include several French tortes, such as Gâteau Mercédès and Gâteau Alcazar.) When the cake is layered, a thick covering of icing is placed between the layers, and there is almost always icing on the tops and sides of the torte. A number of European tortes do not have layers.
Following are two recipes for Chocolate Pecan Torte. The FIRST is easier and fun to make! Lots of shortcuts. The SECOND is fabulous but much more involved. They're both tasty! As always, a lot depends on the quality of your ingredients.

1. Chocolate Pecan Torte 
from Epicurean.com This recipe is fun to make, as well as easy and delicious. O.K. it's not traditional, but its great!

Ingredients:
No-stick flour and oil baking spray
1 prepared 8 or 9 inch pecan pie, thawed if frozen
1 box (about 1 pound 4 ounces) fudge brownie mix, makes a 9-by-13-inch pan
1/4 cup brewed coffee or water
2 tablespoons bourbon or other whiskey
1/2 cup vegetable oil
2 eggs, large or extra-large

Directions:
Heat oven to 325F. Spray interior of 9-inch springform pan with baking spray.
Cover surface of pie with plastic wrap and top with plate. Invert pie onto plate, and remove pie tin. Invert prepared springform pan over pie and then invert whole, so that  pie slides into pan. Remove plate and, using the plastic wrap to keep your hands clean, smash pie so it fills bottom of pan.
Mix brownie mix, coffee, bourbon, oil, and eggs in medium mixing bowl until smooth and texture of wet mud. Pour over pie and smooth top. Bake until sides are firm and top is crusty but center is still soft, about 50 minutes. Cool until pan is comfortable to touch; remove sides of pan and cool completely. Cut into wedges to serve.
***

This
SECOND recipe
won the $1000 1985 Woman's Day "Yummiest Chocolate Recipe Contest." I've changed it slightly, adding more chocolate and an apricot jam filling. This torte is more traditional and reminds me of a Viennese Torte. You can substitute raspberry or peach jam.

2. Chocolate Pecan Torte

Chocolate Pecan Torte:
12 ounces dark  chocolate (70% cacao-fair trade organic)
2 ounces unsweetened chocolate
1 1/4 cup pecans
3/4 cup softened unsalted butter
1 cup sugar
5 eggs, separated
1/3 cup sifted flour
2 Tbsp dark rum
2 tsp Madagascar vanilla

Apricot Filling:
1/3 cup apricot jam
1 Tbsp orange liqueur
2 Tbsp dark rum
2 tsp lemon juice

Chocolate Glaze:
6 ounces dark chocolate (65-70% cacao)
2 Tbsp heavy cream
2 Tbsp unsalted butter

Decoration:
1/2 cup pecan halves
1 Tbsp unsalted butter
1 Tbsp Apricot Filling

Directions
Preheat oven to 325 degrees.

Butter 9" springform pan and dust with cocoa, shaking out excess. Set aside.

In top of double boiler, over hot water, melt the two chocolates together. Stir until smooth, and completely combined. Remove from heat, and allow chocolate to cool slightly.

Using food processor, grind pecans fine with about 1/2 cup of the sugar. Add butter and remaining sugar, creaming together well. Beat in egg yolks, rum, and vanilla extract. Add flour and process with the rest. 

Add melted and cooled chocolate, and process again.
It's quite dense.

Whip egg whites until they form stiff peaks. Mix about 1/3 of beaten egg whites into thick chocolate batter, then fold chocolate mixture into remaining whites, folding thoroughly.

Spread chocolate batter into prepared springform pan, and bake in preheated 325 degrees oven for 30 minutes or more, until toothpick inserted in center comes slightly moist.

Remove torte from oven, and allow to cool and settle in pan.

Take off springform, and transfer torte to its serving dish.

Sieve apricot jam into small saucepan. Add orange liqueur, rum, and lemon juice. Bring to boil, stirring. Reduce heat and simmer a moment, then remove pan. Reserve 1 tablespoon of finished glaze for pecan trim, and spread rest over torte. Allow apricot filling to set, then top with chocolate glaze.

In top of double boiler, over hot water, melt chocolate and cream together. Remove from heat, and stir in butter, whisking till smooth. Allow glaze to cool until it will spread smoothly over torte. Use metal spatula to smooth it evenly over top, and coat sides with thinner layer.

In small sauce pan, combine apricot glaze, and butter. Melt them together. Add pecan halves, and stir until all are coated. Drain nuts, and allow to set slightly, then press around edge of torte.


Wednesday, August 21, 2024

SPUMONI CAKE: History and Recipes for National Spumoni Day!

Today is National Spumoni Day! Spumoni, not to be confused with zamboni, is a multicolored Italian dessert. When I was growing up, it was usually a flavorless ice cream served in Italian restaurants at the end of a meal. It wasn't until I visited Italian friends that I had really good Spumoni.

By definition, Spumoni is a special Italian dessert made of layers of ice cream, whipped cream, candied fruit, and nuts. Each layer contains different flavors and ingredients. In traditional dessert kitchens, spumoni is often made of three layers of flavor: chocolate, pistachio, and cherry. Each layer of Spumoni ice cream may include more than flavored ice cream. The chocolate layer, for example, may include chocolate shavings or chunks. Sometimes the chocolate layer has crushed hazelnuts inside. Not only does the hazelnut add a lovely flavor to the chocolate, but it also compliments the pistachio layer. The pistachio layer, of course, almost always includes crushed pistachio nuts. Finally, the fruit layer of spumoni is usually made with candied fruit. The cherry layer is the most traditional fruit component to the dessert.
 
Edy's and Dreyer's make Spumoni ice-cream available all year round. Yum!

You can make your own spumoni ice cream today, but if you can't find any and you don't want to make your own, you can always make Spumoni Cake. 

The trick to making beautiful Spumoni Cake is to have layers! This can be done by baking different layers or just layering a bundt cake in the bundt pan (no swirling).

Because this is such a special holiday, I'm posting an easy Spumoni Cake recipe and linking several others for those of you who are more adventurous or have more time!

Easy Spumoni Bundt Cake
Recipe on the Duncan Hines Baker's Club Forum: Source: Our Favorite Recipes St. John Neumann Catholic Church-recipe: Emile Bernard

You can add chopped up maraschino cherries to the Red Layer, chocolate chips, or grated chocolate to the chocolate layer, and crushed or chopped pistachios to the green layer. Also, you can put pistachio pudding in the green layer for flavor!

Ingredients
1 (18.25 oz.) pkg. white or yellow cake mix
4 large eggs
3/4 cup vegetable oil
1 (8 oz.) container sour cream
1 (4 serving size) pkg. instant vanilla pudding mix
2 ounces unsweetened chocolate (melted)
green coloring drops
marachino cherries
red food coloring
1/2 cup chopped nuts

Directions
Pre-heat Coven to 350. Grease bundt pan.
Combine cake mix, eggs, oil, sour cream, and pudding mix; beat until well blended.
Divide batter into 3 bowls.
To bowl #1, add and mix in 1/2 cup chopped nuts, 5-6 drops green food coloring, 1/2 tsp. almond extract.
To bowl #2, add and mix in 1 (4 oz.) jar cut up and well drained maraschino cherries, 5-6 drops red food coloring.
To bowl #3, add and mix in 2 (1 oz. each) squares melted unsweetened chocolate.
Pour green batter into pan first, then the red (pink) batter, and over this the chocolate batter. Be sure NOT to swirl or mix batters.
Bake at 350 degrees for 50-60 minutes until cake tests done. Cool in pan for 30 minutes; remove from pan and cool completely.
Here are three more recipes for very different Spumoni Cakes:

Margie Slivnske (San Jose Easy Meals Examiner)  Easy, and my personal favorite.

Bette Ubaldini's Spumoni Cake  This is another easy recipe, and it's delicious.

Celebration Generation  A little more complicated, but worth it.

And here's a recipe for Spumoni Cake from 1960.


Tuesday, August 20, 2024

BETTER BACON BROWNIES: National Bacon Day!

Today is National Bacon Day! I've posted several chocolate bacon recipes over the years for National Bacon Day, as well as for International Bacon Day in September. Bacon provides a great saltiness that complements chocolate. This recipe for Better Bacon Brownies is adapted from AllRecipes.com.  Of course, you can add more bacon to the recipe if you'd like. I love that you caramelize the bacon first. No time to caramelize or cook the bacon? Costco has a great deal on Bacon Crumbles made from real bacon! Just throw them into your favorite Brownie recipe!

Better Bacon Brownies

Ingredients
1/4 pound bacon, cut into 1/4-inch dice
2 Tbsp honey
1/2 cup melted unsalted butter
1 cup brown sugar
1/4 cup white sugar
1 1/2 tsp vanilla extract
2 eggs, lightly beaten
3/4 cup all-purpose flour
1/2 cup DARK cocoa powder
1/4 tsp salt
1/2 cup dark chocolate chips (or chopped chocolate)

Directions
Preheat oven to 350 degrees F.
Grease 8-inch square baking dish.
Fry bacon in skillet over medium-high heat until nearly crisp, about 5 minutes. Add honey and stir until foaming subsides. Remove bacon with slotted spoon to plate to cool.
Mix melted butter, brown sugar, white sugar, and vanilla extract in a large bowl; mix in eggs.
Sift flour, cocoa powder, and salt together in bowl; add to egg mixture.
Fold bacon and chocolate chips into mixture; pour into prepared baking dish.
Bake in preheated oven until toothpick inserted into center comes out clean, 25 to 35 minutes.
Allow brownies to cool for 20 minutes before cutting into squares.

Monday, August 19, 2024

(Almost) Instant 3-Ingredient Vanilla Soft Serve

If you know me, you know I'm a huge fan of Beyond Good Chocolate Company. I admire their company and how they work to make the world better! 

I always have a Beyond Good Madagascar 70% chocolate bar in my desk. But Beyond Good also has great quality vanilla products.  

Our mission is to change the way the world experiences chocolate and vanilla. It’s a world with too many middlemen who walk away with too much of the profit. A world where beans are stripped of their natural taste and farmers are treated like photo-ops. A world where people have been blinded to the beauty of what real chocolate and vanilla can be. We’re bringing that world to an end. 

By sourcing the best quality vanilla and cocoa in the world, directly from the farmers who grow it. By pioneering a business model that has the power to change the food industry, forever. And by inviting you to enjoy something that doesn’t just taste better, it feels better. This is chocolate, and vanilla, made right.

So for today's Soft Serve Food Holiday, here's a recipe from Beyond Good for (Almost) Instant 3-Ingredient Vanilla Soft Serve. Enjoy!

(Almost) Instant 3- Ingredient Vanilla Soft Serve

Ingredients 
2 cups (500ml) whipping cream 
½ cup + 3 tbsp (100g) powdered sugar 
1 tsp Beyond Good Pure Ground Vanilla

Directions
In a ziplock bag, combine the cream, sugar, and vanilla powder. 
Seal the bag well and shake to combine. 
Press out all the air and lay the bag flat on a baking sheet. Freeze until firm. 
Break the ice cream up into chunks and place it in a blender or food processor. 
Process until the ice cream reaches a soft-serve consistency. 
Serve immediately or transfer the ice cream to a freezer-proof container and freeze until firm.

OF course you can add chocolate sauce, if you'd like!

How easy is that?

Cartoon of the Day: Coping Mechanisms


Sunday, August 18, 2024

MALTED MILK BALL CHOCOLATE ICE CREAM PIE: National Ice Cream Pie Day

Today is National Ice Cream Pie Day, and this recipe for Malted Milk Ball Chocolate Ice Cream Pie takes the cake--or, in this case, the pie! If you're like me, you've always wondered about Malted Milk Balls. What are they really?

Lots of companies make them now, but when I was growing up, I only remember one: Hershey's Whoppers Malted Milk Balls. But now I know there were other "old fashioned' brands such as Maltesers. Maybe they weren't available at my candy store? Ghirardelli also makes Milk Chocolate Malt Balls. (There's also a Kittymalt Hairball remedy that I have, but I won't go there).

Malt balls (interchangeable with malted balls but not moth balls!) are also available in a variety of flavors: There are pumpkin spice malted milk balls, dark chocolate milk balls, mint malted milk balls, cookies and cream malted milk balls, peanut butter malted milk balls and yogurt malted milk balls, and many other varieties.

Want to just have the Malt Ball center only? Nuts on Line sells them. These malt ball center only candies can be enrobed in the very best chocolate. You can do it yourself in the same way you make chocolate covered nuts. Just melt some chocolate and dip. I use two forks to make it easy. Dry them on a parchment lined baking sheet.

But what is a malt ball? wiseGeek (clear answers for common questions) has the answer
Malted milk balls are chocolate-coated candies often sold in milk carton packaging to promote their association with flavored milk and malted milkshakes.

The flavor of malted milk balls is often described as nutty or distinctively hearty, much like a grain cereal. The reason for this unusual flavor is the use of a grain treatment known as malting. Barley grains are allowed to germinate after harvest, which changes the sugar composition of the grain, in the same sense that germinated corn becomes more suitable for distillation. The malted barley grain is carefully dried and ground into a powder for confectionery use.

Want a fabulous use for Malted Milk Balls? Well, besides eating them at the movies? Sunset Magazine had a great recipe a few years ago for Malted Milk Ball Ice Cream Pie. I definitely love using candy in pies and cakes. This ice cream pie has crunchy malted milk balls on the bottom, malt ice cream above it, and a layer of dark chocolate frosting. Add some whipped cream and sprinkle with chopped and whole malted milk balls when you serve, and you're good to go.

MALTED MILK BALL CHOCOLATE ICE CREAM PIE

Ingredients
3 1/2 cups malted milk balls, divided
Cookie Crust, using chocolate wafers and a 9-in. cheesecake pan with removable sides (I've posted this recipe before)
1 3/4 quarts vanilla ice cream, softened
3 Tbsp Dutch-process cocoa powder
1 1/2 cups malted milk powder (Malted milk powder is made from milk, barley malt, and wheat; don't confuse it with Ovaltine, which has other ingredients added. Find it next to the chocolate milk powder in well-stocked grocery stores or online)
1 cup whipping cream, divided
6 ounces semisweet chocolate, chopped

Preparation
Arrange a tight layer of malted milk balls (3 cups) over crust. Stir ice cream with cocoa powder and malted milk powder until smooth. Spoon into crust, set on plate, and freeze 5 hours.
Heat 1/2 cup cream meanwhile until simmering. Put chocolate in small metal bowl, pour in cream, and let sit until chocolate is melted, about 2 minutes. Stir until smooth. Let cool completely.
Smooth chocolate ganache over top of pie and freeze until set, about 15 minutes.
  
To serve:
Whip remaining 1/2 cup cream and swirl onto pie. Chop some malted milk balls and drop onto pie; add a few whole balls. Remove rim and serve immediately.
 
Tips: 
Let the pie soften for 5 minutes at room temp to make slicing easier.
If you're having trouble free-ing your pie from its pan, set it over bowl of hot water for a couple of minutes and then slide a thin knife between pan edge and crust. It should pop right out.

Photo: Malted Milk Ice Cream Pie: Yunhee Kim; Styling: Karen Shinto

Saturday, August 17, 2024

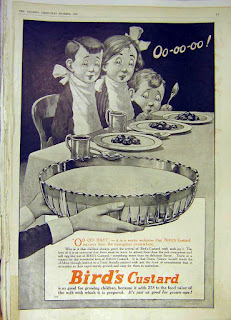
BIRD'S CUSTARD: History and Vintage Ads for National Vanilla Custard Day!

Today is National Vanilla Custard Day. You're probably thinking that Vanilla Custard has nothing to do with a chocolate blog, but it does. Recently I used Bird's Custard for the middle layer of my Nanaimo Bars. They have two other layers that contain chocolate, so don't worry. Bird's Custard is one of my favorite feel-good Retro Foods. I always have it in my pantry. 

Bird's Custard is an artificially-flavored commercial custard powder, that is not really a true custard as it is not thickened with eggs. Rather it uses cornstarch. Bird's Custard was invented by Alfred Bird and Sons Ltd. of Birmingham, England, in 1837. Bird created it because his wife was allergic to eggs, the key ingredient used to thicken traditional custard. O.K. we all have our secrets, and this is mine. I love the way it tastes.

And just an FYI, until 2009 many Bird's products, such as its instant custard powder, contained hydrogenated vegetable oil, a product now banned in some countries due to health concerns relating to heart disease. Since 2009 all Bird's custards have moved to non-hydrogenated vegetable oil.

So for your viewing pleasure today, here are some fun Vintage and Retro Ads for Bird's Custard.


Friday, August 16, 2024

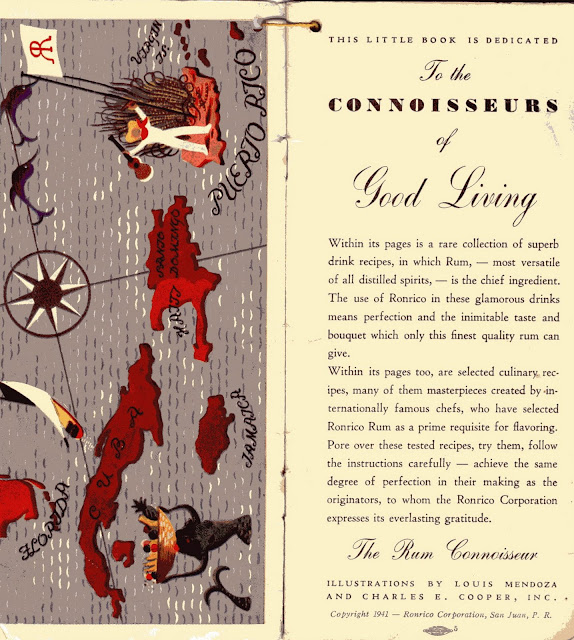
RETRO RUM FUDGE: National Rum Day!

Today is National Rum Day. I love Chocolate and Rum, and I use rum in lots of recipes. I love this 1941 Ronrico Rum recipe pamphlet -- "The Rum Connoisseur"-- a giveaway, I'm sure, from Ronrico Rum. Love the graphics on the cover and title page. So I'm renaming this Retro Rum Day!


Enjoy the Rum Fudge and Rum Marshmallow recipes!


Thursday, August 15, 2024

Happy Birthday, Julia Child! Julia Child's Chocolate Mousse

Happy Birthday, Julia Child!  

Julia Child was born on August 15, 1912. She has inspired millions of amateur cooks and professional chefs with her skills, easy kitchen spirit (how can we forget the chicken?), and passion for learning, since her first cooking program aired on public television in 1963.

Julia Child revolutionized American cuisine through her French cooking school, award-winning cookbooks, and world-renowned television programs by presenting an approachable version of sophisticated French cooking to her eager audience for four decades.

Julia Child began with a passion for good food and the pleasure of cooking, studying in France in the '50s with chef/friend Simone Beck. With the help of Louisette Bertolle, another dedicated food lover, they created a cooking school called L'Ecole des Trois Gourmandes and later, in 1961, completed their groundbreaking cookbook, Mastering the Art of French Cooking.

Her book and television show that followed made the mysteries of fancy French cuisine approachable, introducing gourmet ingredients, demonstrating culinary techniques, and most importantly, encouraging everyday "home chefs" to practice cooking as art, not to dread it as a chore.

Julia Child passed away on August 12, 2004

In honor of her birthday, here's her recipe for Chocolate Mousse or Mousse a la Chocolate! Be sure and scroll to watch the video at the end from her TV series The French Cook.

Julia Child's Chocolate Mousse 

Ingredients 
6 ounces (170g) bittersweet or semisweet chocolate, chopped
6 ounces (170g) unsalted butter, cut into small pieces
1/4 cup (60ml) dark-brewed coffee
4 large eggs, separated
2/3 cup (170g), plus 1 tablespoon sugar
2 tablespoons (30ml) dark rum
1 tablespoon (15ml) water pinch of salt

Directions
1. Heat a saucepan one-third full with hot water, and in a bowl set on top, melt together the chocolate, butter and coffee, stirring over the barely simmering water, until smooth. Remove from heat.
2. Fill a large bowl with ice water and set aside.
3. In a bowl large enough to nest securely on the saucepan of simmering water, whisk the yolks of the eggs with the 2/3 cup of sugar, rum, and water for about 3 minutes until the mixture is thick, like runny mayonnaise. (You can also use a handheld electric mixer.)
3. Remove from heat and place the bowl of whipped egg yolks within the bowl of ice water and beat until cool and thick, as shown in the photo above. Then fold the chocolate mixture into the egg yolks.
4. In a separate bowl, beat the egg whites with the salt until frothy. Continue to beat until they start to hold their shape. Whip in the tablespoon of sugar and continue to beat until thick and shiny, but not completely stiff, then the vanilla.
5. Fold one-third of the beaten egg whites into the chocolate mixture, then fold in the remainder of the whites just until incorporated, but don't overdo it or the mousse will lose volume.
6. Transfer the mousse to a serving bowl or divide into serving dishes, and refrigerate for at least 4 hours, until firm.

Not clear enough? Watch Julia Child make Chocolate Mousse on The French Chef. This originally appeared on PBS.

Wednesday, August 14, 2024

CREAMSICLE TRUFFLES: National Creamsicle Day


Today is National Creamsicle Day. I haven't had a Creamsicle in years, but I did occasionally buy one from the Good Humor Truck when I was a child. Fudgsicle, of course, was my favorite!

What exactly is a Creamsicle? A Creamsicle is a frozen dessert with a vanilla ice cream core and a fruit sherbet coating.

The classic Creamsicle flavor combination is orange and vanilla. Officially, the term “Creamsicle” is a registered brand name owned by Unilever, and similar products cannot be labeled as Creamsicles. However, the original Creamsicle® is such a perennial best-seller that the term is often used generically, and the branding rights may eventually be lost due to trademark dilution. 

So to honor National Creamsicle Day -- and to add chocolate -- make these Orange Creamsicle Truffles. Love this easy recipe.

FYI: You can substitute lemon juice and zest, and you have another winner--but it won't be a Creamsicle!

ORANGE CREAMSICLE TRUFFLES

Ingredients 
1/4 cup unsalted butter
Zest of 1/2 orange
3 Tbsp heavy cream
1 cup 'real' white chocolate chopped (Guittard) or white chocolate chips
1/2 tsp orange extract
1/4 cup powdered sugar

Directions 
Put white chocolate in mixing bowl, set aside.
Melt butter with orange zest in small saucepan. Stir in cream and scald mixture.
Pour hot cream mixture through mesh sieve over white chocolate and using rubber spatula press zest against sieve to release orange oils into mixture. Allow mixture to rest 1 minute, add orange extract to white chocolate mixture then stir until smooth.
Cover mixture and refrigerate 2 hours or until firm enough to handle.
Scoop mixture out with small cookie scoop or teaspoon and form into balls.
Roll balls in powdered sugar.
Freeze truffles 20 minutes before eating.

Tuesday, August 13, 2024

Prosecco Chocolate Cake: National Prosecco Day


Today is National Prosecco Day, and since I love Prosecco, I had to pair it with chocolate. Here's an easy recipe for Prosecco Chocolate Cake. 

BTW, Prosecco is an affordable, versatile, appealing, good-quality sparkling wine.

The difference between Prosecco and Champagne: 

Sparkling wine can only be referred to as champagne when it originates from the Champagne region of France. Prosecco is specific to the Veneto region in northern Italy. In terms of technique, the two are also made in different ways: for both wines, the grapes are fermented twice, but with prosecco, at least one fermentation takes place in a stainless-steel vat. Champagne is fermented twice in the bottle.


Prosecco Chocolate Cake

Ingredients
2 cups sifted cake flour
1/4 cup DARK cocoa
1 1/2 cups sugar (superfine is best, regular is ok), divided
1 Tbsp baking powder
1/2 tsp salt
3/4 cup Prosecco
5 Tbsp vegetable oil
1 1/2 tsp pure vanilla extract
7 large egg yolks
7 large egg whites, at room temperature

Directions
Preheat oven to 325F. Use an ungreased 10" Bundt Pan.
In large bowl, whisk together flour, cocoa, sugar (reserving 2 Tbsp), baking powder, and salt.
In medium bowl, whisk together champagne, vegetable oil, vanilla, and egg yolks, then pour into dry ingredients and whisk until just smooth.
In another large bowl, using electric mixer, beat egg whites to stiff peaks. Add remaining 2 Tbsp of sugar gradually, starting when whites begin to get foamy.
Once egg whites have reached stiff peaks (do not overheat), gently whisk 1/4 of egg whites into Prosecco batter. Gently, working in two additions, fold remaining beaten whites into Prosecco batter until no streaks of egg white foam remain visible and batter is uniform color. Be sure to scrape sides and bottom of bowl well.
Pour into ungreased bundt pan and bake for 50-60 minutes, until top of cake springs back when gently touched and toothpick inserted into center comes out clean.
Invert onto wire rack and let cool completely.
Once cooled, run knife around the edges and turn cake out onto a serving platter.
Dust with powdered sugar or cocoa.

Serve with whipped cream and a glass of Prosecco

Monday, August 12, 2024

What's the Difference between Vanilla Ice Cream and French Vanilla Ice Cream?

I often serve vanilla ice cream with brownies, pies, and cakes, and I often wondered "What's the Difference between Vanilla Ice Cream and French Vanilla Ice Cream?" Now I Know!

French Vanilla Ice Cream is a different color than Vanilla Ice Cream, and that's due to the process rather than the vanilla bean varieties, named for where they’re grown, like Madagascar, Tahiti, and Mexico. French Vanilla refers not to a vanilla variety but to the classic French way of making ice cream using an egg-custard base. The eggs give French Vanilla ice cream a smoother consistency and subtle yellow color. I definitely think that French vanilla ice cream is richer.

Vanilla Ice Cream is made with just milk and cream, without eggs, and is called Philadelphia-style vanilla ice-cream. Having grown up in Philadelphia, this was news to me.

The French Connection: Actually French Vanilla ice cream dates back to colonial times. Both Thomas Jefferson and George Washington used ice cream recipes that included egg yolks. Jefferson's family's ice cream recipe which calls for six egg yolks per quart of cream may have originated with his French butler.

Jefferson's recipe for French Vanilla Ice Cream: Handwritten recipe below is from the Library of Congress collection. Recipe from www.monticello.org

Thomas Jefferson's Vanilla Ice Cream Recipe

Ingredients:
2 Bottles of Good Cream
6 Yolks of eggs
1/2 pound sugar

Directions
Mix the yolks and sugar put the cream on a fire in a casserole, first putting in a stick of vanilla.

When near boiling, take it off and pour it gently into the mixture of eggs and sugar. Stir it well.

Put it on the fire again, stirring it thoroughly with a spoon to prevent it from sticking to the casserole.

When near boiling, take it off and strain it through a towel. Put it in the Sabottiere [the inner canister in an ice bucket], then set it in ice an hour before it is to be served.

Put into the ice a handful of salt, put salt on the coverlid of the Sabotiere, and cover the whole [thing] with ice. Leave it still half a quarter of an hour. Then turn the Sabottiere in the ice [for] 10 minutes.

Open it ... with a spatula [and remove] the ice from the inner sides of the Sabotiere.

Shut it and replace it in the ice. Open it from time to time to detach the ice from the sides.

When well taken, stir it well with the spatula.

Put it in moulds, justling it well down on the knee. Then put the mould into the same bucket of ice. Leave it there to the moment of serving it.

To withdraw it, immerse the mould in warm water, turning it well [until] it will come out and turn it into a plate.

Visiting Mt. Rushmore? The Memorial Team Ice Cream shop serves up the original recipe.

Which is your favorite? Vanilla Ice Cream or French Vanilla Ice Cream

Sunday, August 11, 2024

S'MORES GRAVENSTEIN APPLES: Gravenstein Apple Fair

I'm a big fan of Gravenstein Apples. We have eleven trees, but every year our abundant crop has begun to be harvested methodically by our golden retrievers. Luckily, we are always able to buy a flat in Sebastopol. Gravenstein apples are my favorites--tart and juicy. Unfortunately they don't have a long shelf life, so you probably won't find them in your market, but if you do, you'll be thrilled with the taste! They're great in pies, applesauce, and cakes, not to mention just for eating! This weekend is the Gravenstein Apple Fair in Sebastopol, Sonoma County, California. Everything Gravenstein and more!

Gravenstein Apples have been a large part of  Sonoma County history since the late 1800s when Nathaniel Griffith with the advice of Luther Burbank cultivated the Gravenstein Apple for commercial use. Nathaniel Griffith was born in Iowa in 1850 and at 24 moved West. He came to California in 1883 and bought 78 acres on Laguna Road. Griffith experimented with many kinds of apples but settled on the Gravenstein. The Gravenstein reportedly originated in Germany in the gardens of the Duke Augustenberg, Castle Graefenstein, Schleswig-Holstein.

Gravenstein apple trees once covered acres of Sonoma County, but many of those apple orchards have been replaced with vineyards. Gravensteins have been declared a Heritage food, giving the apples a much needed boost in the marketplace. The trees were discovered in 1797 but didn’t really become popular until the late 1800s when Nathaniel Griffith began cultivating them for commercial use. Over time, the variety’s use spread in the western U.S., but it was also a favorite in Nova Scotia, Canada and other cool-temperate areas.

Gravensteins are a late summer treat not to be missed. 

S'mores Gravenstein Apples

Ingredients 
6 large Gravenstein Apples 
6 strong pointed bamboo sticks (or Wilton Caramel Apple Branch sticks)
1 (10.5-oz) bag miniature marshmallows
5 tablespoons unsalted butter
12 ounces chocolate, chopped  (or chocolate chips)
1 cup ground graham crackers

Directions
Wash and dry apples. Remove stems and skewer each apple with stick; set aside.
Line baking sheet with parchment paper. Refrigerate for 15 minutes.
Melt butter in saucepan and cook over low heat until melted. Add marshmallows and stir until melted.
Dip each apple in melted marshmallows mixture and transfer to prepared baking sheet. Place in fridge.
In meantime, melt chocolate. Put chocolate in saucepan over saucepan over simmering water. Stir until smooth.
Put ground graham crackers in bowl. Remove apples from fridge and dip apple into melted chocolate (about 2/3 way up) rotating to coat evenly.
Immediately dip chocolate-covered apple into ground graham crackers, and coat on all sides.
Repeat for all apples.
Put apples back on lined baking sheet. Refrigerate for 20 to 30 minutes.

Tip: Twist off apple stem. If skewer is blunt, sharpen with kitchen knife on on end (make diagonal cut). Push firmly into apple.  If juice leaks out, blot with paper towel before dipping.

Want to get fancy? Serve on a bed of chocolate chips, crushed grahams, and mini-marshmallows.